 Previous section
 Return to TactileView manual overview
Changing design size
By default, when you open a new document, the design will have the same size as a full sheet of paper. When you wish to add or remove white space to your design, you can drag the purple markers along the four sides of the design. Notice that this does not scale the contents of the design but only extends or narrows it.
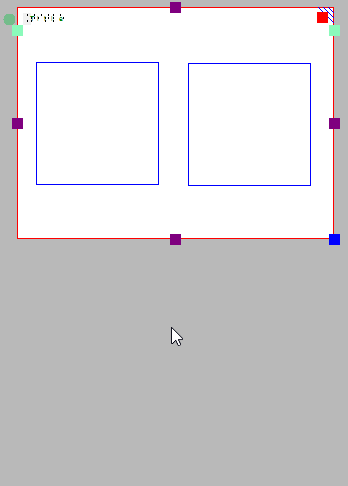
Figure 1. Drag the purple markers to enlarge or reduce the design size.
The blue marker in the bottom right corner can be used to scale the entire design, i.e. enlarge or reduce the design size and all elements. This will change the resolution of the design. Braille characters have a fixed size, so text labels will not be scaled. Keep in mind that text labels might start to overlap with other elements in the design.
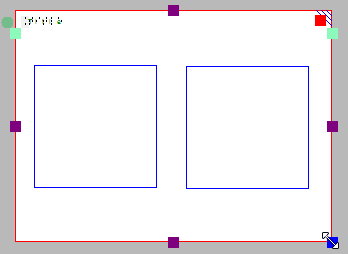
Figure 2. Drag the blue marker in the bottom right corner to scale the design.
The page orientation can be changed at any time to suit the dimensions of the design. The position and size of the image contents will not change, but the edges of the white area will be adapted automatically to fit the design to one or more full pages in the new page orientation. You can change the page orientation in several ways: select ‘Change the orientation to landscape/portrait’ from the toolbar of the design (right vertical toolbar when nothing is selected), from the ‘Page formatting’ toolbar in the second horizontal toolbar, or from the Design menu.
‘Change the orientation to landscape’ icon:
‘Change the orientation to portrait’ icon:
If the image contents fits within a single sheet of paper in the new page orientation, the excess white space will be trimmed in one direction, and added in the other. For example, when changing from portrait to landscape format, the white space on the bottom of the page will be trimmed and the design is widened. This change in page orientation is always reversible later on.
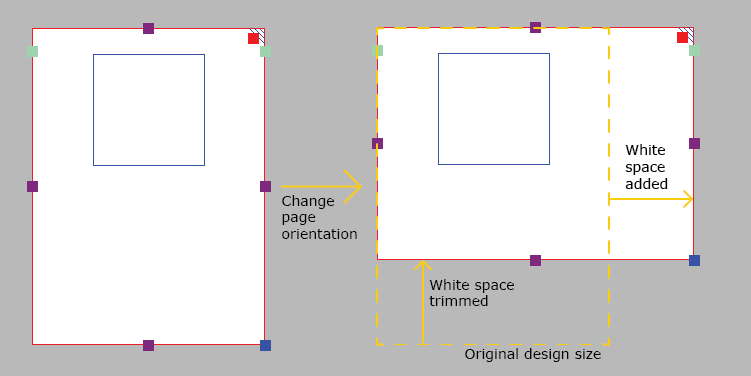
Figure 1. The contents will fit on a single sheet (red border) after changing the page orientation; the white space at the bottom will be trimmed, the right side will be extended.
If on the other hand the original design would not fit within a single page in the new orientation, the design is automatically extended in both directions to fit on two pages. This change is also reversible.
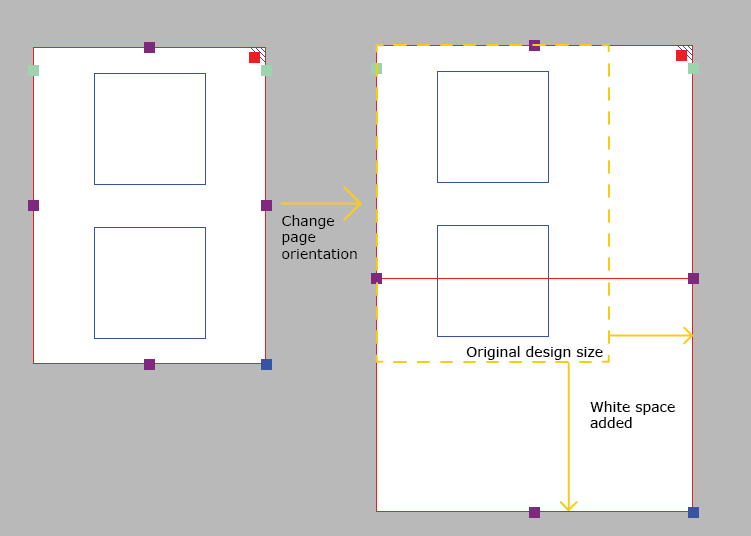
Figure 2. The contents of the design will only fit on two pages (red borders); the white space ate the bottom and right side will be extended to fit the design across both pages.