 Previous section
 Return to TactileView manual overview
In the first tutorial, we covered how to produce a tactile graphic based on an image file by applying one or more image filters. However, not all images are suited for this method, and an adequate image might not always be available. In this tutorial, we will show the most effective way to produce a tactile graphic based on an image file when filters will not do the trick.
Reasons why filters might not work
In the manual section Importing images from the internet, we describe how to select an image that is most suitable for conversion with filters. However, suitable image files are simply not always available. For example, the quality of the tactile graphics can differ based on the level of detail – too much detail, and the elements are no longer distinguishable by touch; too little detail, and the subject might not come across clearly. In other cases, elements such as texts, colour gradients or shadows might disturb or complicate the tactile graphic. When an alternative, more suited image is not available, you will have to carry out additional editing to produce a good quality tactile graphic.
Tracing the image
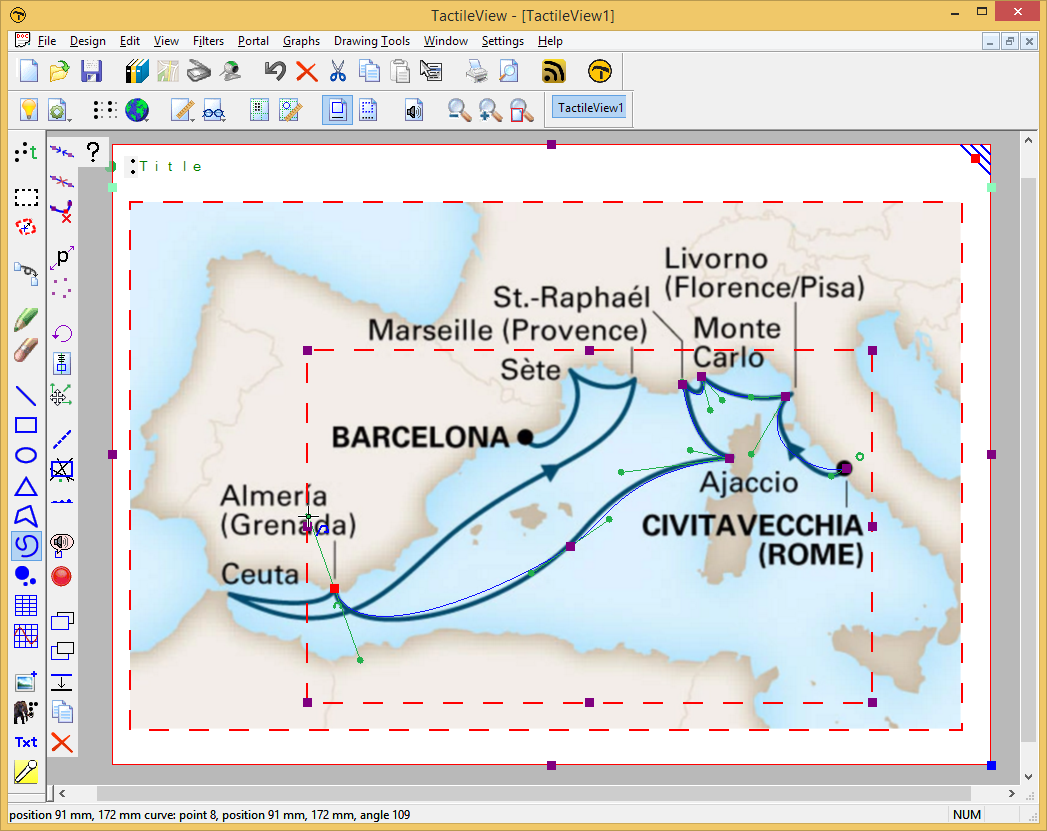
With the Draw path – Curved shape tool that is introduced in TactileView version 2.500, it is easy to trace the required elements in an image. You can accurately match the curves and shapes in the images that you wish to present in the tactile graphic. Another added benefit of this method is that the path is an object (as signified by its blue colour), which means that you have full control over properties such as line style and can scale the elements to any size if required.
To see how we edited an image using the ‘Draw path – Curved shape’ tool, watch the video or scroll down for step by step instructions.
Step by step guide
1. Import the image
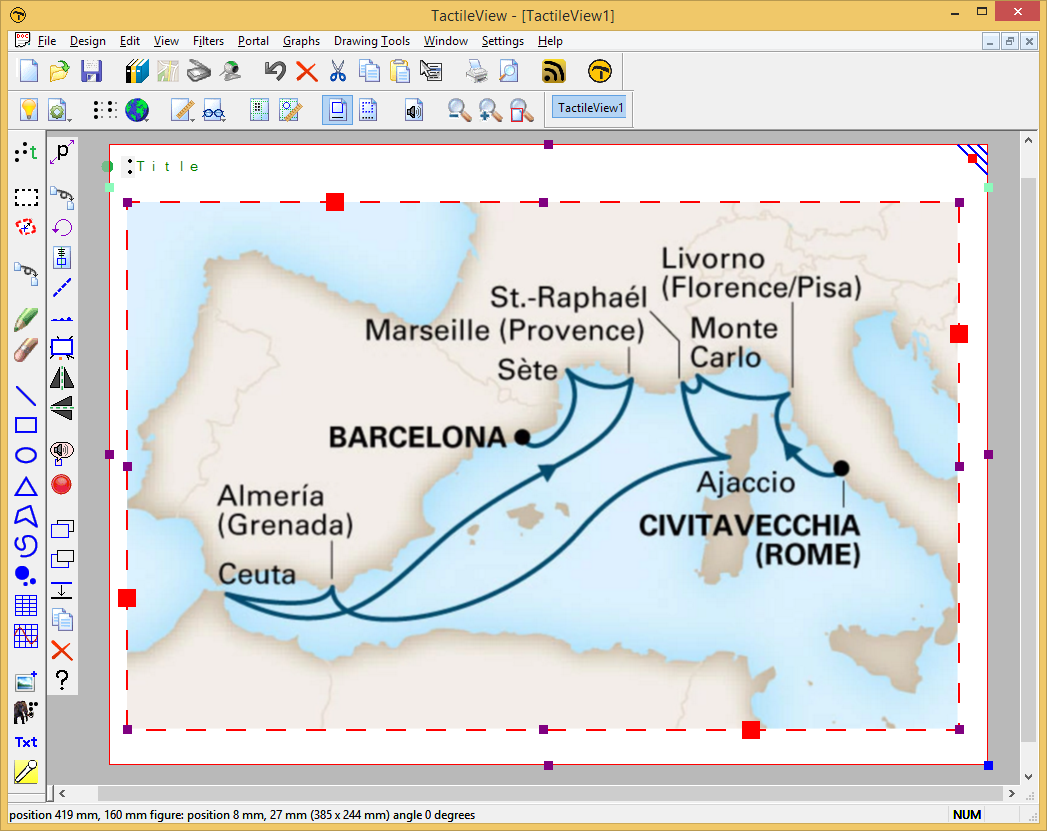
Place the image that you wish to use in your TactileView design by selecting ‘Import’ from the drawing tools on the left, then select ‘Import image from file’. Resize the image to suit the selected paper size. In this tutorial, we will use a map of a cruise holiday as an example.
2. Tracing elements in the image
Choose which elements you need to trace in the image to convert it to a tactile graphic. In our example, we will be tracing the contours of the coastline as well as the route of the cruise. The coastline of the islands will be traced as a separate element.
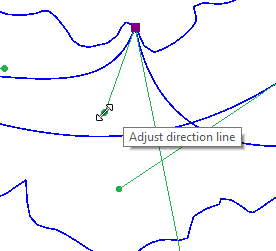
To start tracing the elements in the image, select the ‘Draw path – curved shape’ drawing tool from the drawing tools toolbar and choose ‘Click and draw (Bezier curve)’. Position the cursor at the start of the line, then click and drag to place the first anchor point. The direction in which you drag determines the direction of your curved line. Move to the first point along the line where it changes direction and place the next anchor point by clicking and dragging.
3. Finishing the traced line
Once you have placed all the anchor points along the line in the image, click on the green semicircle that is visible next to the last placed anchor point.
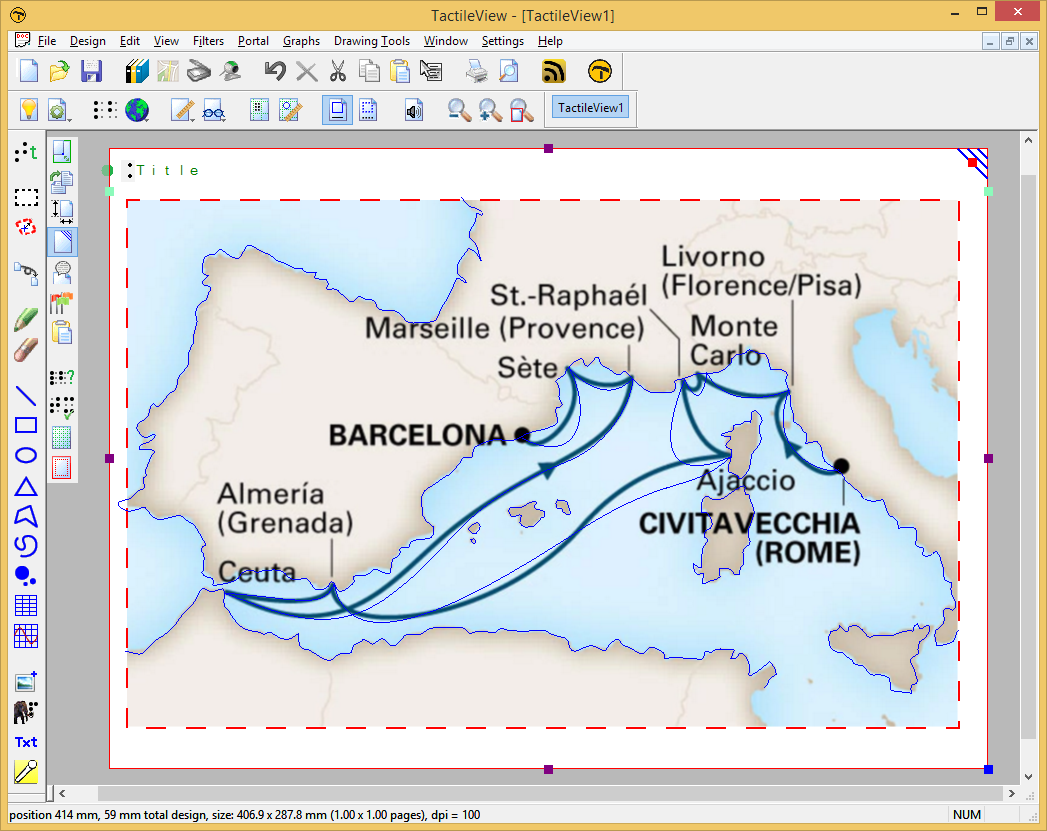
4. Remove the image file
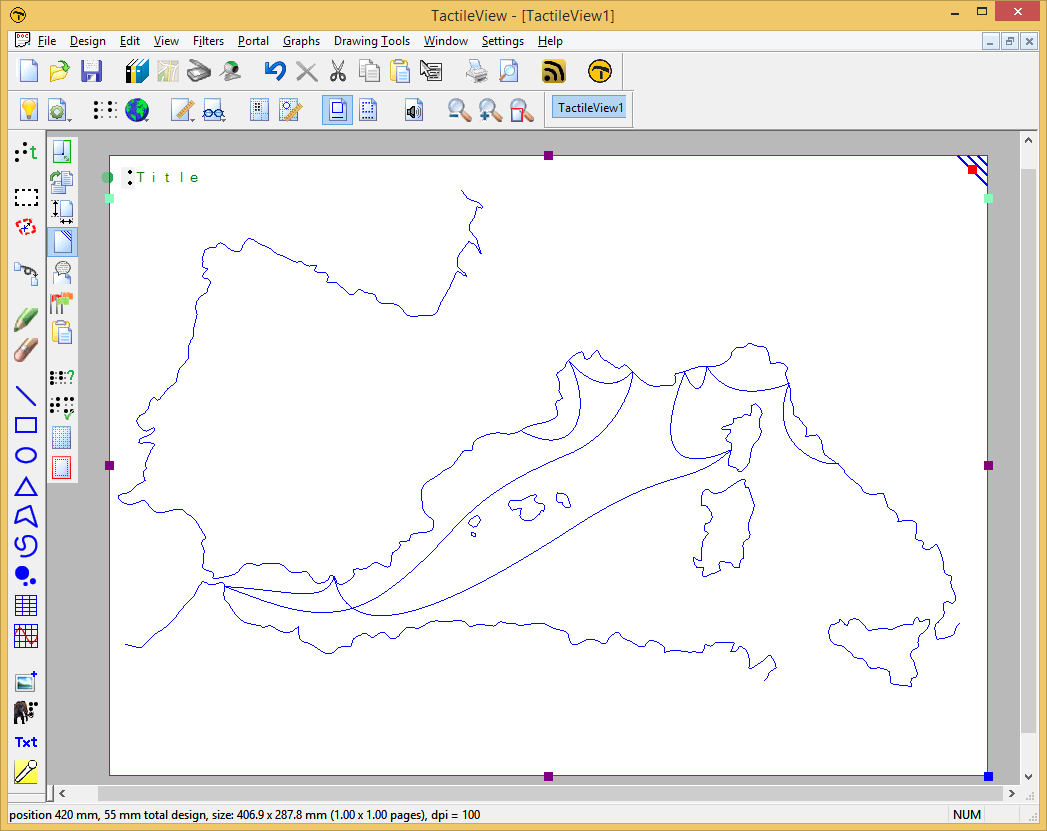
Once you are finished tracing the image, you can remove it again by selecting it and pressing the Delete key.
5. Refining the lines
You can always refine the contours of the line that you created by adjusting the green handles at the anchor points. For the best accuracy, it is best to switch to ‘Design mode: dot view’ in the lower horizontal toolbar to check the exact positioning of the braille dots.
6. Apply braille text labels
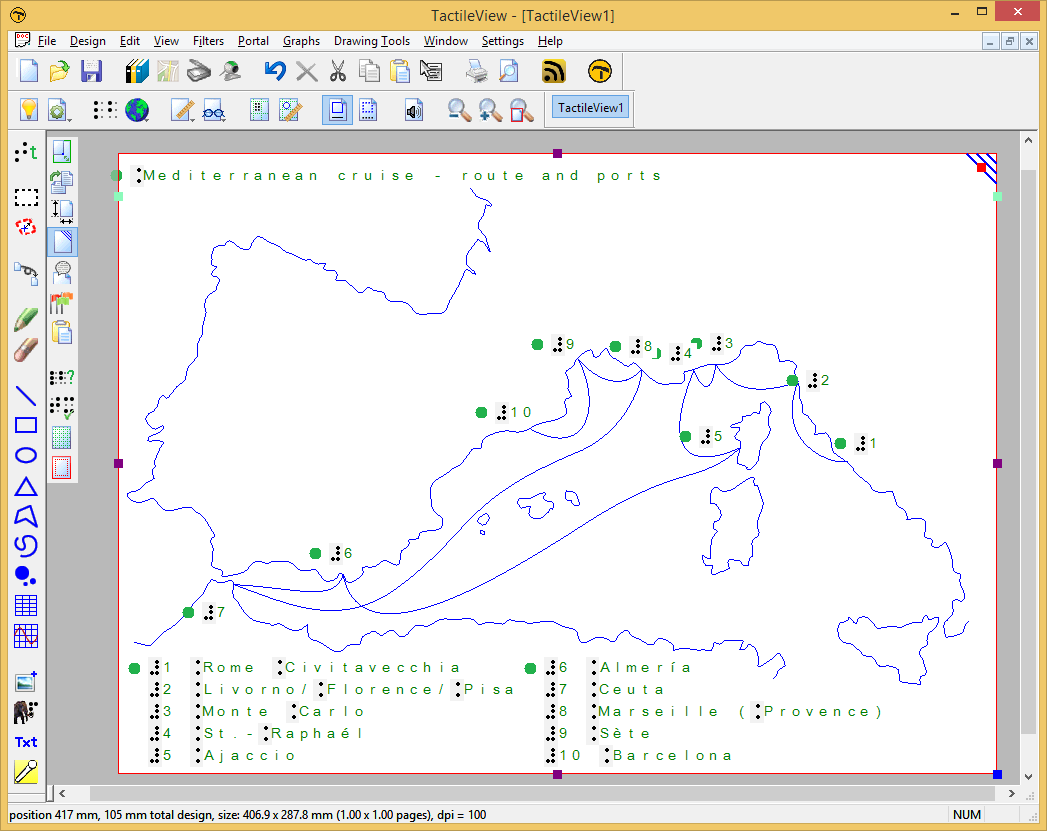
Most tactile graphics gain a lot of clarity by using text labels to mark the different elements in the image. In our example, the cities along the route are labeled with numbers in the map, with the city names listed below.
7. Applying line styles and other properties
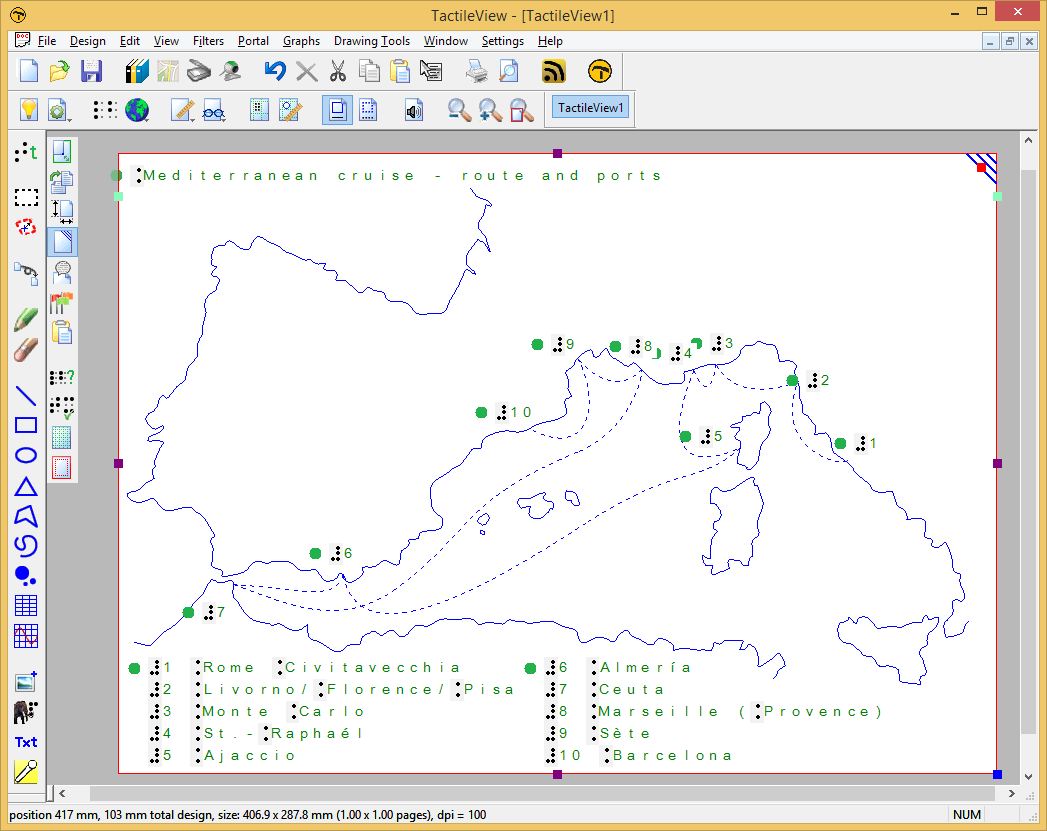
Once the elements of the image are traced, we have the added benefit that we can apply a range of properties to the different sections of the image. In our example, we can give the route of the cruise a different line style to distinguish it from the lines that mark the coastline. To do this, select the curved line object of the cruise route, then select ‘Line style’ from the properties toolbar and select a line style.
You could also choose to fill the land in the map with a texture to make it easier to feel the difference between land and water.