Detailed description
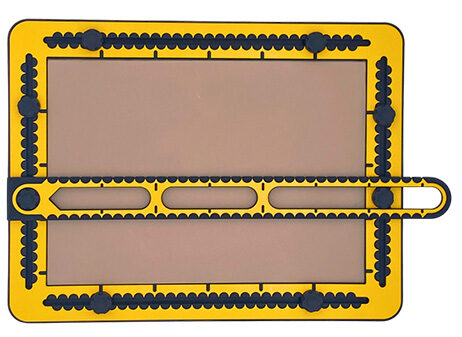
The ruler’s width is 4 centimetres, and has a lenght 43 centimetres long. At one end of the ruler, a 2 centimetre wide round hole is made. In the rest of the ruler there is a 2 centimetre wide groove.
The groove has two bridges; one at 10 centimetres, the next at 20 centimetres. Indents in the groove indicate a 5 centimetre distance in between. The ruler has measurement indications on both sides, for a length of 35 centimeters. One side has small indents along the edge every centimetre, the other side is slick.
To description section
To manual section
Ruler manual
Knobs
Especially for the ruler the knobs in the frame of the drawing board come in handy. They can be placed at any position in the grooves. With just the hole on a knob, the ruler can still rotate. In case the ruler’s groove is placed over a second knob, the ruler is fixed. For an exact horizontal or vertical alignment knobs have to be in equal positions in opposing grooves. When the ruler is horizontally or vertically placed, with the hole over a knob, the zero position of the ruler is on the edge of the drawing area.
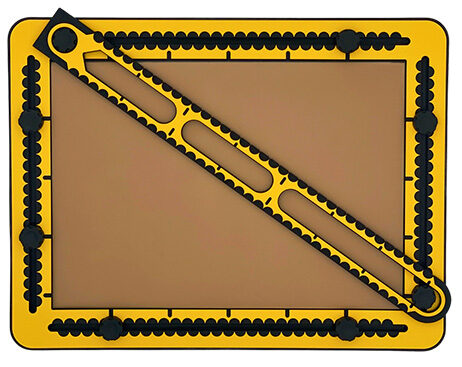
Diagonal lines
One of the two knobs in two grooves is placed at the very far end of the groove. For drawing a line at a precise position, take into account that the rulers edge is 1 centimeter wide.
The hole that fits around the knob is two centimetres wide and sits in the middle of the ruler. In other words positioning the ruler on a desired position is two centimetres higher or lower or left/right respectively, seen from the centre of the knob. Another method is to have the knobs partly unscrewed so they can move. Place the ruler on two knobs and slide the edge of the ruler to the desired position, using the measurement indications of the frame.
Draw a (long) straight line
For many purposes it makes sense to have a horizontal and or vertical line as a start for a drawing. Whether it is the bottom line, the horizon or an axis. Find the horizontal and or vertical positions for knobs, draw the lines and remove the ruler from the knobs. For shorter lines you can use also the sides of the triangles as a ruler.
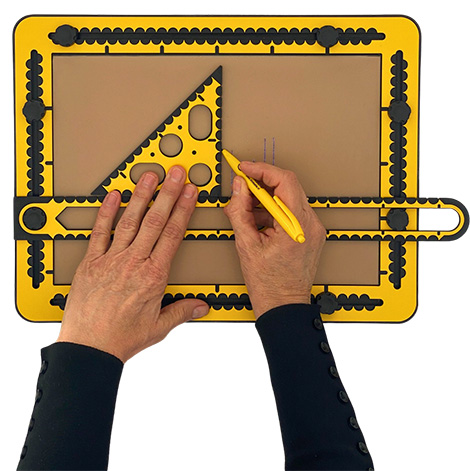
Aligning tools with the ruler
Leaving the ruler sitting on two knobs while placing other tools against the ruler’s edge, helps to add more lines/elements to the drawing. Aligning the tools of the TactiForma or the triangles that come with the TactiPad can be useful.
X and Y axis/coordinate system example
It is assumed, the drawing board is in landscape orientation. Place the knobs in the vertical grooves at positions 9 and 11 centimetres respectively. Place the ruler over the lowest two knobs. Draw a line horizontally at 10 centimetres (the X axis) Everything above the ruler has a positive Y value.
Reposition the ruler on the two higher knobs and everything below the ruler has a negative value. Place the knobs at 14 and 16 centimetres in the horizontal grooves. Place the ruler on the knobs at 14 centimetres and draw a vertical line at 15 centimetres, the Y axis. Having the knobs in these positions and switching the ruler enables to align and measure for positive and negative values along both axes.
 Previous section

 Table of content