The TactiForma set contains two spur wheel tools:
- 12 teeth with diameter 7 centimetre
- 20 teeth with diameter 11 centimetre
To description section
To manual section
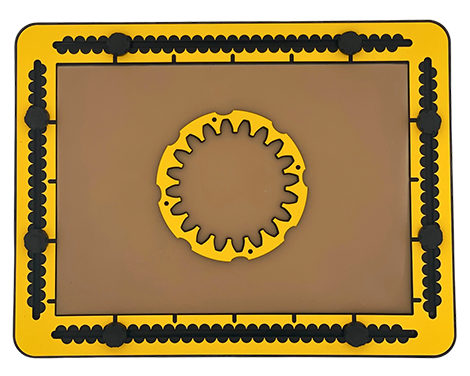
07.1 – Detailed description of the spur wheel tool
The wheels in the set have 12 and 20 teeth respectively. The body of the spur wheel is a circle with eight finger fitters around the outside. The body width is about six millimetres. From this inside circle the ‘negative’ teeth are pointing towards the centre. After tracing the inner contour, the spaces between the teeth are in fact the positive teeth around the outside of the spur wheel. Pushpin markers are located on the top surface of the body.
07.2 – Remarks
There are different types of spur wheels for various applications. Although it looks like any number of teeth can be placed around a circle, this is not the case. The TactiForma spur wheels represent the mechanical properties with which the force from one wheel onto the other is maximised. When the two wheels are interlinked, their teeth always have a point of contact at an angle of 90 degrees while rotating. This gives an impression of how delicate spur wheel systems are in mechanics.
Even though the two spur wheels differ in diameter, the size and shape of the teeth on both wheels are similar. For practical reasons the largest spur wheel can hold the smaller one.
07.3 – Spur wheel tool manual
We recommend using two pushpins to fixate the tool on the TactiPad, because a spur wheel is a relative time-consuming shape to create. Place a spur wheel somewhere on the TactiPad and draw the inner contour. You have set the first step into the mechanical domain.
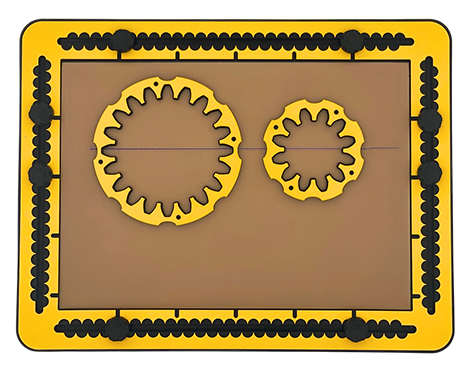
07.4 – Interlinking the 12 and 20 teeth spur wheel
Once you have interlinked two spur wheels, you will experience a complex issue: finding the perfect position for one tooth on the one and one tooth on the other wheel to “bite into each other”. The distance between the centre positions of the two spur wheels is 17 centimetres. Draw a straight line and align the spur wheels along the finger fitters with this line. Carefully check the positions of the teeth. You may need to slightly rotate the second spur wheel.
07.5 – Finding the centre position of the spur wheel
The open space at the inside of the spur wheel does not make it easy to place the centre on a pre-defined position. You have to create support lines and align the tool with the finger fitters. Let us know your experiences.
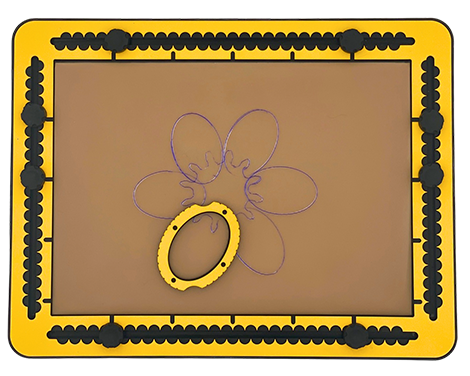
07.6 – Fantasy: Spur wheel as the start for a flower
Use the 12 tooth spur wheel. Combine this with the 6*4 centimetre ellipse in the ‘horizontal’ or ‘vertical’ orientation.
Enclose three teeth within the ellipse and draw the whole or a part of the ellipse. Repeat this three times until you have all teeth covered. Alternatively, enclose two teeth within the ellipse and draw the shape five times for a more delicate flower. You can add more details with an equilateral triangle.
 Previous section

 Table of content