Global description
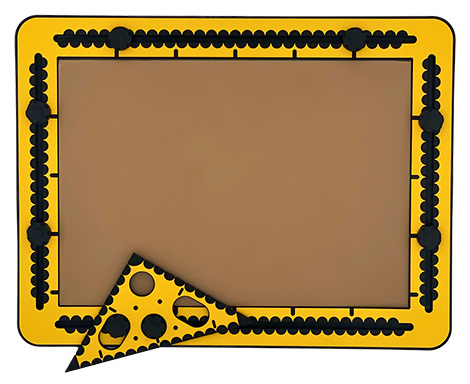
The triangle with the two 45 degree and one 90 degree corners is referred to as the 45Triangle. The rectangular 45Triangle has the same measurement indication as the drawing board. The two short sides have a range of 10 centimetres, while the long side has a length of 14 centimetres. There are four holes in the triangle for fixing it over the knobs of the drawing board.
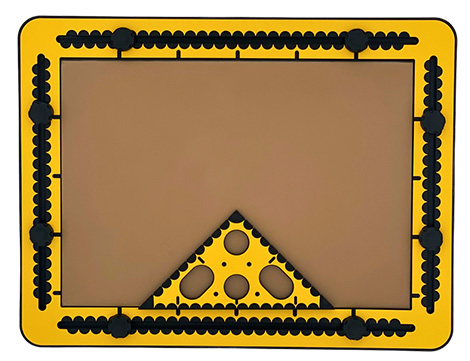
At a distance of one centimetre from the right corner a hole is made. In the middle of the long side, one centimetre distance to the edge, a hole is made. To the left and right are two long holes. Along the short sides small indents per centimetre are present. The long side (hypotenuse) is slik. Small grooves in the top surface indicate distances of five centimetres. Pushpin markers are available.
45Triangle manual
Triangle as ruler
Basically all tools that have a straight side can be used as a ruler. It is a matter of preference and which tool is most handy. The slik side of the 45Triangle is sometimes preferable because tracing the pen tip along an indented side causes interruptions.
Using the knobs in the drawing board frame
The round hole in the 90 degree corner fits around a knob. Aligning one of the short sides of the triangle with the edge of the frame, makes two angles on the board, one of 90 and one of 45 degrees.
When putting the hole in the middle of the long side and one of the others over a knob, an angle of 30 or 60 degrees can be made by turning the triangle to its extreme position.
Bar chart example; 10 centimetres stands for 100%
Place the drawing board in landscape orientation. Place one of the knobs in both vertical grooves 16 centimetres from the top. Add the ruler onto the knobs. The edge is now at position 15. Draw a line.
Align the 45Triangle
Find the five centimetres position of the ruler. Align the short side of the triangle with the ruler so the 45 degrees corner is pointing to the right. Draw a line along the vertical side of the triangle. Start at position 10 and draw the line downwards, on to the ruler. 10 centimetres represent 100%. While the tool is still in place, mark positions 2,5, 5 and 7,5 with the pen. Move the triangle two centimetres to the right (position 7) and draw a line starting at five which represents a value of 50%. Create more bars where one centimetre stands for 10%. Horizontally there is enough space to create bars for the 12 months of the year. With a spacing of two centimetres you can add a character or a mark below the bar to indicate a specific bar.
Please note: Bar charts generally have two lines that make up for one bar. Here the bar is only one line wide. The space between the bars is there to distinguish one from the other.
 Previous section

 Table of content