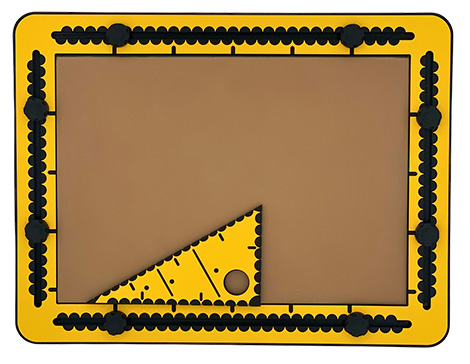
10.1 – Introductory description
The triangle with 30, 60 and 90 degrees corners is referred as the 30Triangle. The main purpose of this tool is to create three dimensional shapes.
When the three corners of the triangle are set to 30, 60 and 90 degrees respectively, it is known as a ‘1/2/sqr(3) triangle’. As a given, the three sides always have these proportional lengths. For practical reasons, the longest right side (sqr(3)) of the triangle tool is set to 15 centimetres (about 6 inches). The length for the other two sides can then be calculated as 15/sqr(3) multiplied by 0.5 or 1 respectively. (8.66 and 17.3 centimetres). The 30 degrees corner is pointing to the left when the surface with the tactile measurement indications is facing up and the 90 degree angle is at the bottom right.
10.2 – Detailed description
For the two sides connecting at the 90 degree corner, the measurement indications are in centimetres. The distance between the units along the hypotenuse is somewhat arbitrary! For the 30Triangle it was decided on 20 units spread over 17.32 centimetres, which is rounded 0.87 centimetre per unit. With this regular pattern it is easy to count/measure from both the 30 and 60 degrees corners onwards in groups of 5 units. The measurement indications at the top surface of the triangle are semi circles. At each measurement unit also a small indent is provided. Per five units a short groove at the top surface is provided for easy counting.
As a tactile guidance, when following the two long narrow grooves in the top surface, they are pointing to equal positions on the longest right side and the hypotenuse. A hole of two centimetres can be found near the 90 degree corner. It can be used to place the triangle over one of the black knobs in the TactiPad frame. Pushpin markers are available.
10.3 – Considerations for the design
In the design story you can read about the practical approaches that were taken to determine the measurement system for the hypotenuse. The insights may help to utilise the tool.
10.4 – 30Triangle manual
10.5 Aligning with the drawing board frame
The hole near the 90-degree corner can be placed around one of the knobs. Aligning one side of the 30triangle with the side of the frame offers a 60 or 90 degrees angle in reference to the paper edge.
10.6 – 3D coordinate system
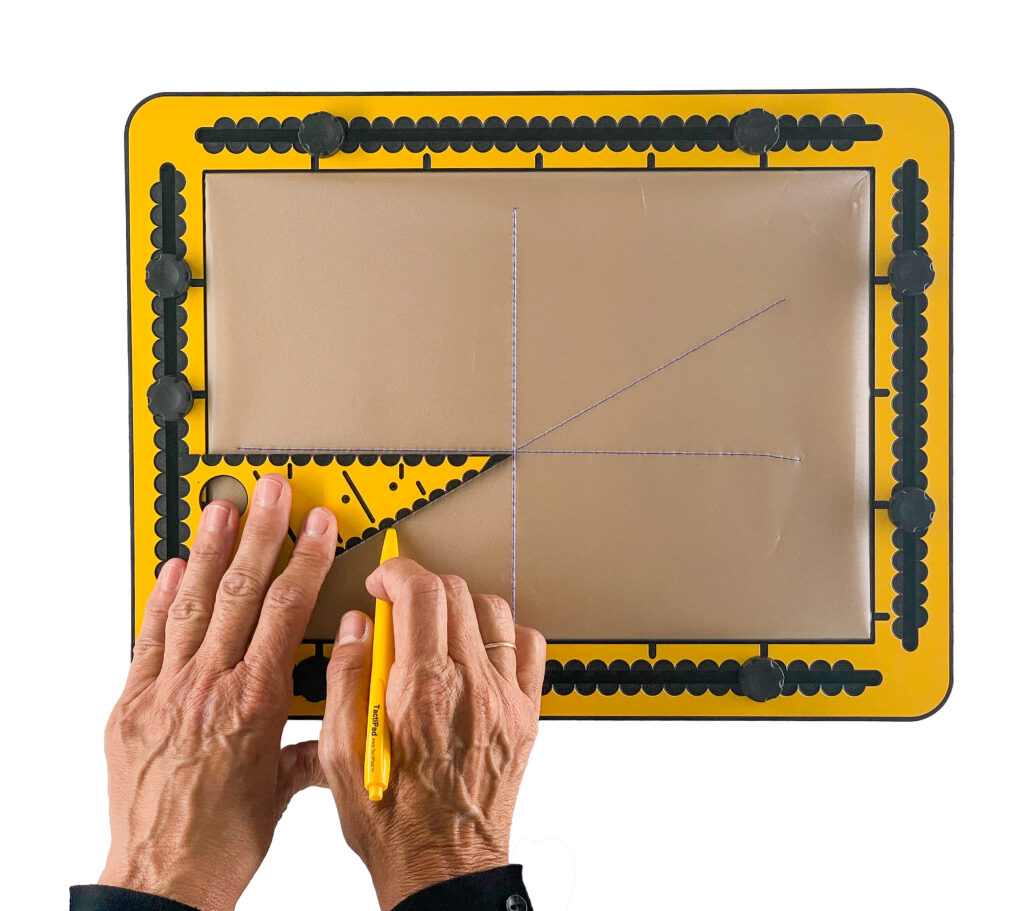
Put the drawing board in landscape orientation. Draw a vertical line at 10 centimetres and a horizontal one at 15 centimetres. Align the triangle with the ruler where the 30 degrees corner is at the crossing of the two lines. Draw a line along the hypotenuse. In a 3D coordinate system the hypotenuse is the X axis. The longest side aligned with the horizontal line serves as the Y axis. The vertical line is the Z axis. You can decide if you want to use any measuring system along the axes.
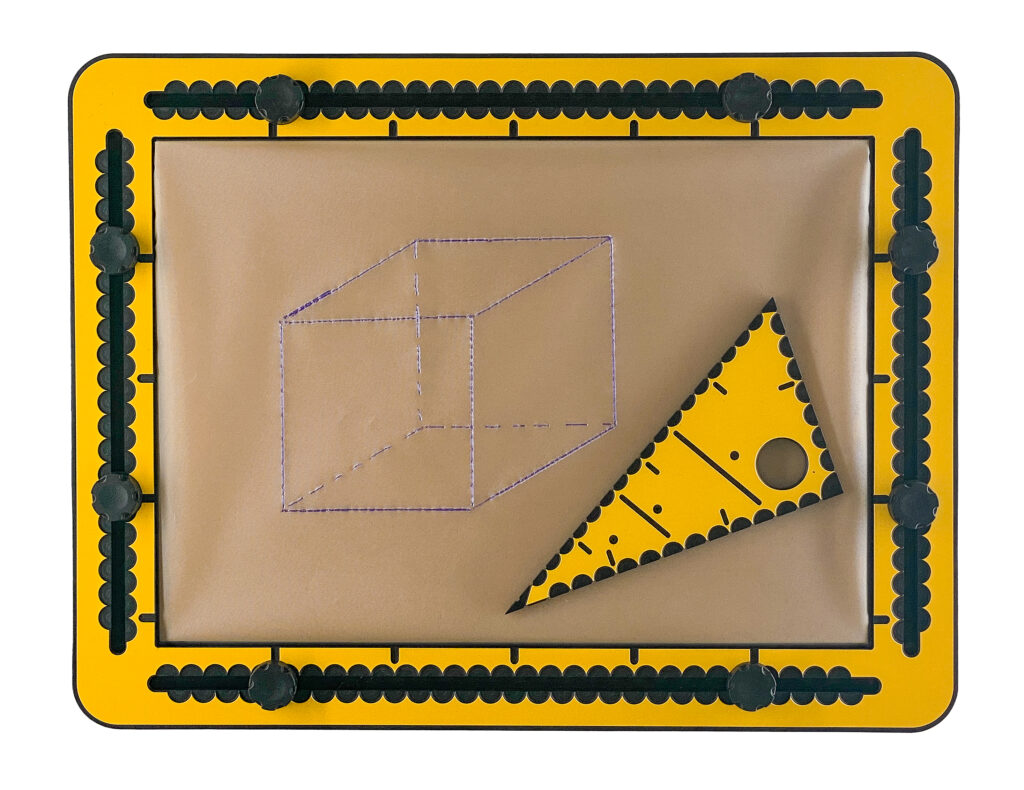
10.7 Drawing a cube with sides eight centimetres; exercise
Note: In this exercise no coordinate system is used.
Maybe having a die is handy to imagine the below. In total 12 lines are required to form the cube. The eight corners are named A, B, C and D for the bottom surface and E, F, G and H for the top surface. The corner E is positioned above corner A. The line A-B is horizontal and going to be nearest to you. For the length of the sides eight measurement units are taken; centimetres or the small ones along the hypotenuse. The order in which the lines are drawn may seem illogical, but moving the tools around is minimised.
Steps to take:
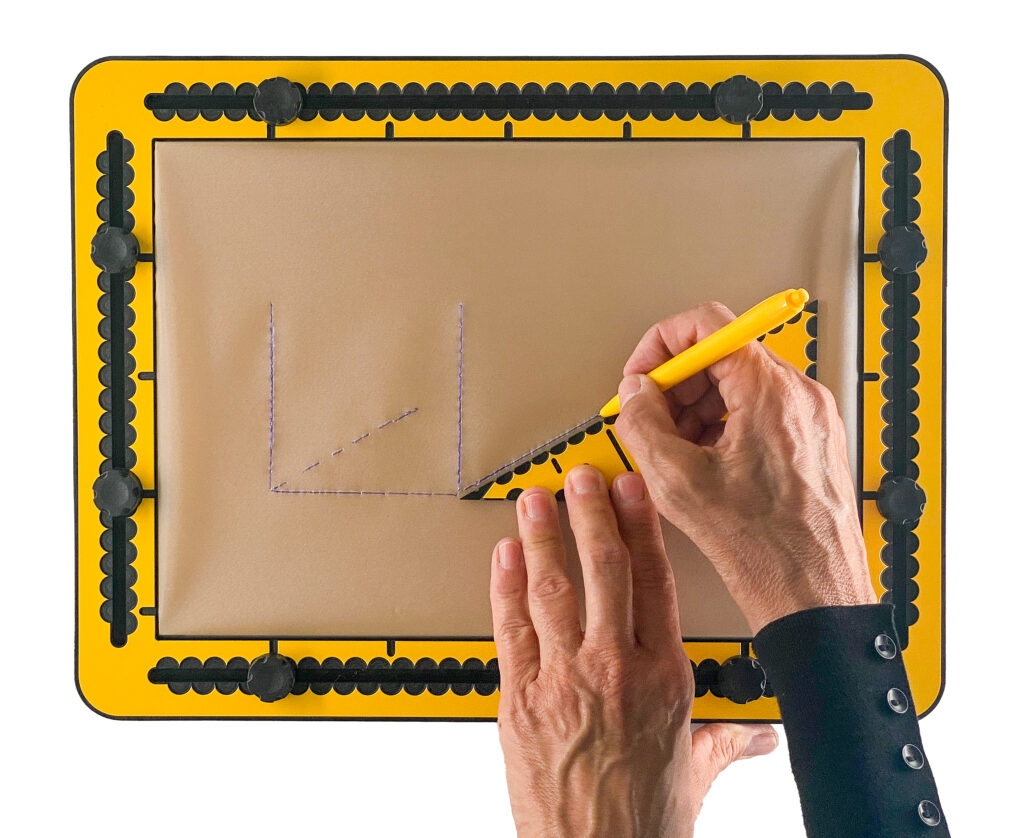
- Step 1: Place the ruler at 15 centimetres horizontally in order to make sure the lowest side of the front face is horizontal in reference to the paper’s edge.
- Step 2, rib A-E: Place the 30triangle against the ruler with its 90-degree corner pointing to the right. Align the triangle’s 90-degree corner with the five centimetre position on the ruler (the triangle will protrude slightly beyond the left edge of the drawing board). Draw a line along the triangle’s short side downwards from the triangle’s eight centimetre position to the ruler.
- Step 3, rib A-D: Shift the triangle to the right until the 30 degrees corner is at the A corner. Hold the triangle tight against the ruler. Draw a dashed line spanning eight units along the hypotenuse. Make sure there is at least a line fraction at corners A and D.
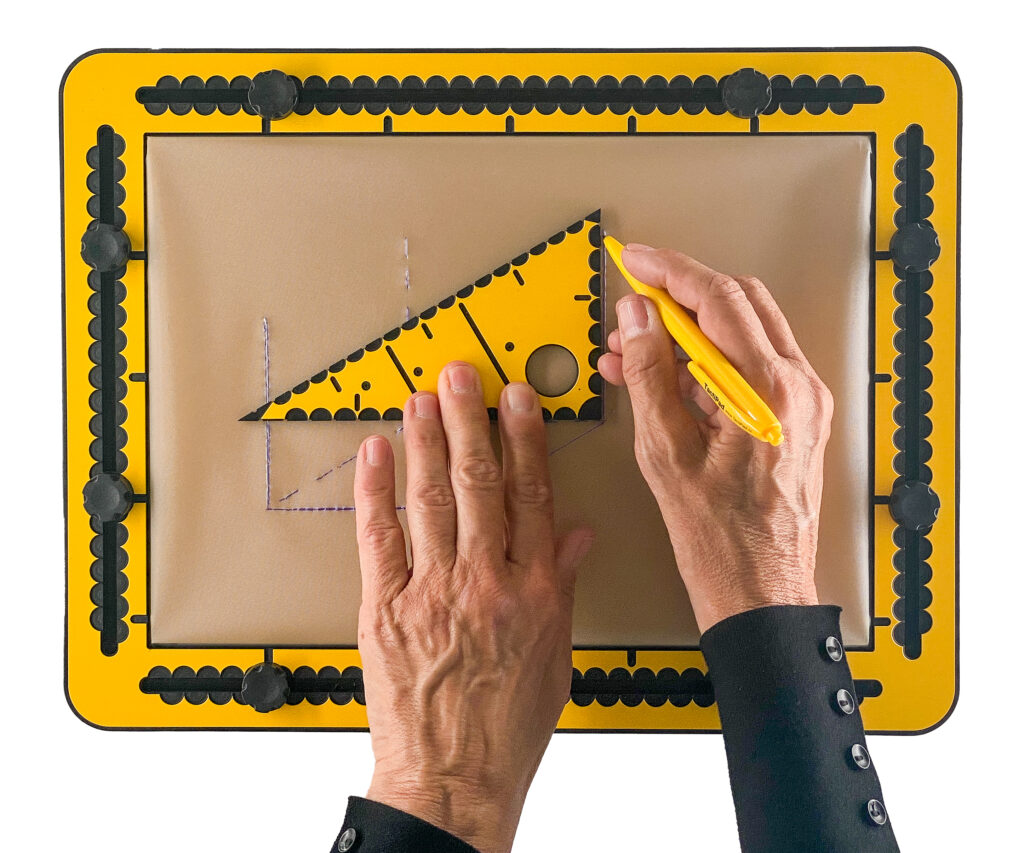
- Step 4, rib A-B: Draw along the ruler for eight centimetres from the corner A, the point where the rib A-E touches the ruler.
- Step 5, rib B-F: Move the triangle’s 90-degree corner to the right over eight centimetres to the end of the line A-B. Draw the vertical line from the triangle’s eight centimetre position downwards to the ruler.
- Step 6, rib B-C: Move and align the triangle further to the right until the 30 degrees corner is at corner B. Draw for this rib a solid line with the length of eight units along the hypotenuse.
- Step 7, rib C-D: Move the ruler up as far as the line endings of the lines A-D and B-C just peep out from underneath the ruler. Find corner D, draw a dashed line to the right to corner C. This completes the bottom face of the cube. (A-B-C-D)
- Step 8, rib D-H: The ruler is already in a good position. Place the triangle with the 90-degree corner at corner D and draw a dashed line along the triangle from the eight centimetre position downwards onto the ruler.
- Step 9, rib C-G: Move the triangle to the right until the 90-degree corner of the triangle is at corner C. Draw a solid line from the eight centimetre position downwards onto the ruler. At this stage only the top face has to be finished.
- Step 10, rib E-F: Move the ruler up until the end points of the lines A-E and B-F peep out from underneath the ruler. Create a line between the two endpoints of the vertical ribs. The front face is ready.
- Step 11, rib E-H: The ruler is again in a good position. Place the 30 degrees corner at corner E while holding the triangle against the ruler. Draw a solid line with a length of eight units along the hypotenuse. Corner E and H do exist already.
- Step 12, rib F-G: Move the triangle to the right, place the 30 degrees corner at the F corner. Draw a solid line along the hypotenuse with a length of eight units. The right hand face is completed.
- Step 13, rib G-H: Move the ruler up and connect the two line endings at corners H (left) and G (right).
You are done!
10.8 Using a 3D coordinate system for a cube
Once a 3D coordinate system is created, a few of the ribs are already available. There are two options to choose from: Corner A at the position where the three axes cross or corner D at this position. In case A is at the crossing, corner E is on the vertical (Z) axis. Otherwise you find corner H here. Drawing a cube can be performed with a square tool faster. See the manual section on the TactiForma square tool. The grid boxes provided by the GraphGrid enable indicating the corners of the cube. Or other 3D figures. The motorised drawing arm (MDA) is even faster. In addition it enables to draw the cube in any rotation angle over the X, Y or Z axis.
 Previous section

 Table of content