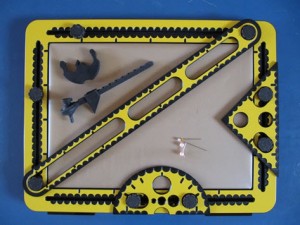
Skip NavigationMenu

09. Digital Pen – The pen in stand-by

The software always responds to pen contact when the receiver is connected and the pen functions correctly. Upon starting the software the pen does not have a drawing function yet, to prevent unintentional drawing. The pen stays stand-by until a drawing function is assigned to the pen. The pen’s function can be set at any time, using the context menus.
The basic moves of the pen are those where the pen is pressed down for a long or short time on the same position on the drawing surface. Pressing down and releasing without moving results in a short or long pen click. When the pen is pressed down and the tip is meanwhile moved on the drawing surface, there is pen contact and simultaneous movement (drawing).
The context menu containing the current options for the pen (which options are available depends on the user’s previous actions) is opened using a long pen click, or when the pen does not move whilst pressing down for approximately one second. Short pen clicks are used to select an option in an opened menu. The option to put the pen back to stand-by can be found in nearly every context menu.

10 Digital Pen – Opening a context menu and selecting options

The context menus of the TactileView software can be opened by clicking with the pen on any position on the drawing surface during approximately one second. An ascending piano sound indicates that the menu is being opened. When the pen is released or moved before the fifth note is played, opening the menu is cancelled to prevent interrupting a drawing activity.

For selecting and activating the options in the context menu the software uses the pen’s last clicked (‘current’) position. By using this point as starting position, the next click lands on a certain position related to this point. Every position related to this starting position has a specific result.

By shortly clicking with the pen on the same, ‘current’ position again, the next option in the newly opened context menu is selected. These clicks can be repeated endlessly to cycle through the context menu: after the last option is shown, the first option in the list is shown again.

By clicking about 1 centimetre above the current position, the previous option in the list is shown, and the presentation sequence is inverted. Clicking on this higher position again then shows the previous option, instead of the next. By clicking on the initial position, about 1 centimetre below this current higher position, the next option is shown again and the presentation sequence is changed back to normal.

By clicking 1 centimetre to the right of the last clicked position, the selected option in the menu is activated, just like using the ‘enter’ key. When the chosen option also includes a list of options, you can click on the current position to show all options of this submenu. Once more, clicking 1 centimetre to the right activates an option from the submenu.

By clicking left of the current position, the menu or submenu is cancelled, just like using the ‘escape’ key.

11. Digital Pen – Explore mode and design mode

The software starts in the design mode. In this mode, all drawing functions are available. Using the ‘Drawing tools’ menu or the TactileView digital pen, you can start drawing by selecting one of the drawing tools.
To explore a diagram with speech and sound, the program needs to be switched to explore mode. This is done using the context menu in design mode or using the hotkey Ctrl+E. As long as the software is in explore mode, the design cannot be adjusted.

12. Digital Pen – Creating a tactile diagram – Design mode

Combined with the TactiPad, the digital pen can be used to create a tactile diagram in the TactileView software. To do this, the pen has to be assigned to one of the drawing tool functions, just like the mouse would. When a drawing tool is activated, it can be used to make a digital drawing.
The option ‘Drawing tools’ in the context menu of the design mode gives access to all the tools. Every drawing tool is made to achieve specific results, such as drawing a line or square, placing a text label and more. These are placed as so called objects in the diagram.
Tactile recognizable points or a tactile diagram on the TactiPad can be used as a reference for easy drawing. The results are described by spoken messages.

Every drawing tool has a number of options, by which the drawing tool can be adjusted via a context menu. For example, when drawing a line, one can choose the line thickness and style. It is virtually impossible to draw a steady thick dotted line by hand with the pen; instead, the software can easily create this by defining a starting and ending point and providing the line in between with the desired properties.
When an object is placed with the drawing tools, one can always adjust this object later on via the context menu of the used drawing tool or object.

13. Digital Pen – Exploring audio-tactile images with speech and sound – Explore mode

Tactile diagrams that have been made with the TactileView software can be enriched with audio-information, so that the diagram becomes an audio-tactile diagram. This diagram needs to be placed on the TactileView ClickPad or the TactiPad, so that the physical position you click on matches with the position in the corresponding file. The pen is used to indicate the location, and the software then automatically checks in the matching file if there is audio information available at this position. After a short click, the audio is played.
To be able to hear the audio information, the software needs to operate in the explore mode.
Once more, a long click in the explore mode opens a context menu. In this menu, various options can be chosen that are of importance for exploring the diagram, like opening the digital file matching a different tactile diagram, selecting a text to speech voice or calibrating the TactileView digital pen.

01. ClickPad – Audio-tactile images – Introduction

The TactileView ClickPad is a clipboard, on which a tactile image is placed. Combined with the TactileView digital pen and the TactileView software, the ClickPad functions as a touch screen. On this, a VIP (Visually Impaired Person) can explore an audio-tactile image; a tactile image that contains audible information as well. The digital pen is used as a click and point device similar to a computer mouse, and tells the computer on which position of the image has been clicked. The software then plays any audio information that is present at the clicked position.

02. ClickPad – Set up

The TactileView ClickPad holds both the tactile image, and the holder with the receiver for the TactileView digital pen.
The rubber bands on the corners of the ClickPad make sure the tactile image is always on the same position. The holder for the receiver is placed at the edges, using magnets in the sides. This results in the images always being in the correct position for pointing on them with the TactileView digital pen.
At a click of the pen, the horizontal and vertical distance to the upper left corner is measured and converted by the receiver. The exact position is then transmitted to the TactileView software on the computer. In the file, which matches the tactile image, these positions are used to play the corresponding audible information. When calibrated correctly, the position on which is clicked on the tactile image, always matches that same position in the digital equivalent.
Exchanging the tactile image is very easy, using the flexible paper clamps. Exploring diagrams in portrait can be alternated with diagrams in landscape by accordingly placing the receiver on either the long or the short side of the ClickPad.

03. ClickPad – Description

The TactileView ClickPad

The ClickPad is a yellow, 5 millimeter thick plate, with anti-slip material on the underside. The ClickPad is available in A4, A3 and US letter format to match the different sizes of tactile images.
The ClickPad is slightly wider at its four edges, and has notches in which rubber bands are placed. The tactile image is held in place by these rubber bands. In one long side are four holes for storing the ClickPad in a two or four ring binder.

Magnets in the sides

Four magnets have been placed in the edges of the ClickPad. Two in one long side, two in one short side. Two magnets are also mounted in the holder for the receiver of the TactileView digital pen. This way, the holder will be attracted to the ClickPad.
Depending on the page orientation the holder is at the long side (landscape) or at the short side (portrait).
The holder can be detached and attached again. The magnets make sure that the holder automatically falls in the right position. The receiver for the TactileView digital pen can then be connected to the computer by a USB-cable.
The right-up marker on the tactile diagram can always be found in the upper right corner. Use this symbol on the diagram to determine the receiver’s position.

Paper clamps of the TactileView ClickPad

At every corner of the ClickPad a rubber band is attached which crosses itself as a result of a rotation.
On 1,5 and 5 centimeter distance from the corners, there are hook-shaped notches in the outer edge for attaching the rubber band.
To attach the rubber bands, put one around the corner in the two notches farthest from the corner. The band now makes a 45 degrees angle from the long to a short side of the TactileView ClickPad. Hook 2 fingers under the rubber band and rotate so that the band is twisted 180 degrees around your fingers. Pull the rubber band outwards and put it around the corner into the notches closest to the corner.
On the upper side of the ClickPad, the rubber band crosses itself. On the underside the rubber band runs parallel; one between the notches closest to the corner, and one between the two notches farthest from the corner.
With the rubber bands in all four corners of the ClickPad, the paper sheet is fastened all around on 16 places. The rubber bands measure around 7 centimeters for the A4 format and 12 centimeters for the A3 format.

04. ClickPad – TactileView digital pen and software

The digital pen is used to click on the tactile image to listen to any included audio-information, and to operate the TactileView software.
The pen has to be equipped with batteries. In the TactileView drawing software the pen can be tested and calibrated for the ClickPad. To prevent ink from being spilled on the image, it is advised to use the plastic tip included with the TactileView digital pen.

05. ClickPad – Exploring with speech and sound

With the tactile image placed on the ClickPad, the digital version of the design has to be opened as a file in the TactileView drawing software. The software then has to be switched from design mode to explore mode, using the digital pen (or the option in the View menu or hotkey Ctrl+E). Using the File menu, a design can also be opened in the explore mode straight away.
This mode also has a menu that can be operated with a long click of the digital pen (open context menu). From here a different file can be selected, matching a different printed tactile image.
By clicking on the tactile image, the audio-information is played. In case there is no audio-information on that location in the image, a ‘no-audio’ sound is played.