05.1 – The TactiForma contains four ellipses with the inner dimensions
- 5 by 3 centimetres
- 7 by 5 centimetres
- 6 by 4 centimetres
- 8 by 6 centimetres
To description section
To manual section
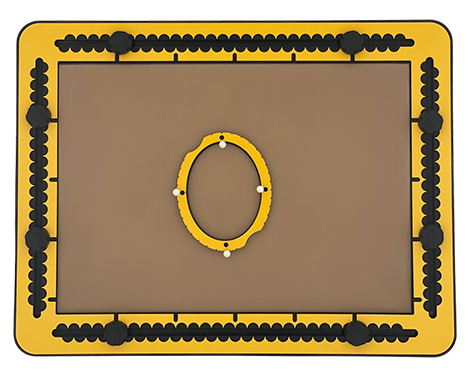
05.2 – Detailed description of the ellipse tool
The body of the tool is symmetrical. It can be seen as a circle, equally stretched in two opposite directions. The frame of the tool is one centimetre wide. On the outer side the frame has two finger fitters for easy grip. Pushpin markers are located at 0, 90, 180 and 270 degrees relative to the centre position. So the markers indicate the longest and shortest diameters of the tool. As the TactiForma ellipse is a circle-based shape, radii can be drawn from the centre. Indents at every 10 degrees along the outside indicate the angles.
05.3 – Ellipse tool manual
05.4 – Ellipse shape
Place the ellipse tool on the TactiPad and hold it at the finger fitters positions. Draw along the inner contour.
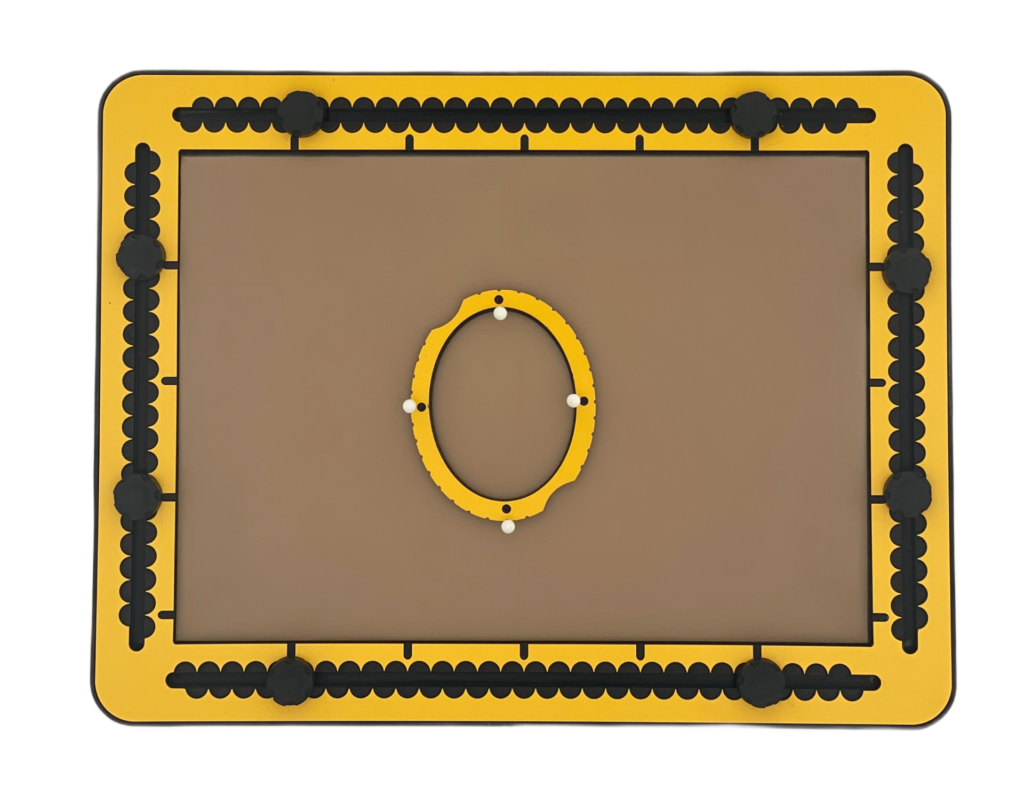
05.5 – Placing the ellipse on a pre-determined centre position
The open space at the inside of the ellipse does not make it easy to place the ellipse centre on a pre-defined position. You have to create support lines.
05.6 – Finding the centre position
As long as you create two crossing lines that are symmetrical, they will pass through the centre position. Symmetrical here means each line is a diameter line, from opposing angle positions, not necessarily the lines of the longest and shortest diagonal. When connecting the pushpins at 0 and 180 and also those at 90 and 270 degrees, you obtain the longest and shortest (orthogonal) diameters. The lines will cross centre position.
Be aware that when placing all four pushpins at the outside and then lifting the tool might cause the pushpins to fall out. To avoid this, place two pushpins at the inner side 0 and 90 degrees and two along the outside at 180 and 270 degrees. By moving the tool slightly upwards away from the pushpins you can safely lift the tool.
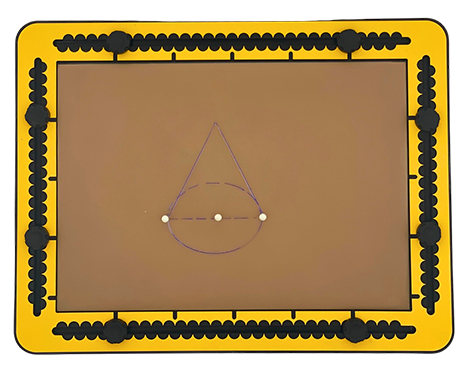
05.7 – Cone
Instead of drawing the full contour you can draw parts or a dashed section of the ellipse. Dashed lines are applied to indicate invisible lines of 3D figures. For a cone, orient the longest diagonal of the ellipse horizontally on the TactiPad. Draw the lower part of the contour as a solid line and the top half as a dashed line. Now you have the bottom section of a cone. The dashed section represents the invisible part of the cone.
This 3D figure can be completed by placing the top (T) above the centre and dashed section of the contour and providing two lines from the position T to both ends of the diagonal. While the push pins are still there, the line for the diagonal at the bottom should be dashed as well because this line is not visible.
05.8 – Cylinder
The cylinder has two ellipses; one for the bottom and another for the top side. Draw the bottom as for the cone. Move the ellipse upwards. Make sure the ellipse for the top surface does not cross anywhere the lines of the bottom side ellipse. Connect the horizontal diagonal positions of the two ellipses with vertical lines.
05.9 – Fantasy 1
Create an ellipse and place a pushpin somewhere along the inner side and rotate the ellipse and draw it again. Choose a different position for the pushpin. Repeat this a few times, for an unexpected result.
05.10 – Fantasy 2
Combine the ellipse with the triangle or square and fit the shapes into each other.
 Previous section

 Table of content