The TactiForma contains seven equilateral triangles. The length of the sides ranges from three to nine centimetres.
To description section
To manual section
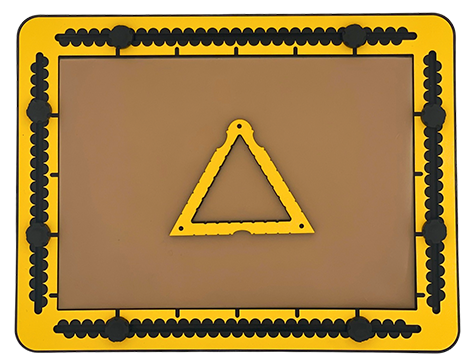
03.1 – Detailed description of the triangle tool
The body of the triangle is about 12 millimetres wide. On all three outer sides a finger fitter is provided for easy lifting or extra grip. One outer corner is rounded, the other two are sharp. All three corners have a pushpin marker on the top surface. Along the outside and inside there are indents at every centimetre. They align with each other. In case the length of the side is odd numbered, there is an additional indent at the halfway position.
03.2 – Remarks
The TactiForma triangle tools are designed as equilateral triangles. This shape is more difficult to draw than an irregular triangle; therefore, you can just mark three positions or place three pushpins somewhere in the drawing area and connect them with a straight line. More triangle variations with specific properties can be created with the square tool or the rectangle hook tool.
03.3 – Equilateral triangle tool manual
03.4 – Equilateral triangle
When you place the triangle tool somewhere on the TactiPad in any orientation and then draw along the inner contour, you have created your first equilateral triangle.
03.5 – Right-angled triangle
Mark with a dot, or for convenience place a pushpin at the halfway position of a side. Start drawing a line from here into a corner. Continue drawing a full side from the same corner. Draw a line from the halfway position to the opposite corner. You have created a 30/60/90 degree triangle, also known as a 1/2/square root3 triangle.
03.6 – Isosceles triangle
Determine what is going to be the bottom side of the triangle. Draw the bottom line from the desired corner position onto the halfway position. Continue this line until you reach the position that has the same distance to the halfway position as your starting point. The starting point is not necessarily the corner of the tool.
For convenience you may place pushpins at the corner positions first or after you have created the base line. Just mark the top corner or place a pushpin in the top corner and provide the lines from the top corner to both base-line corners.
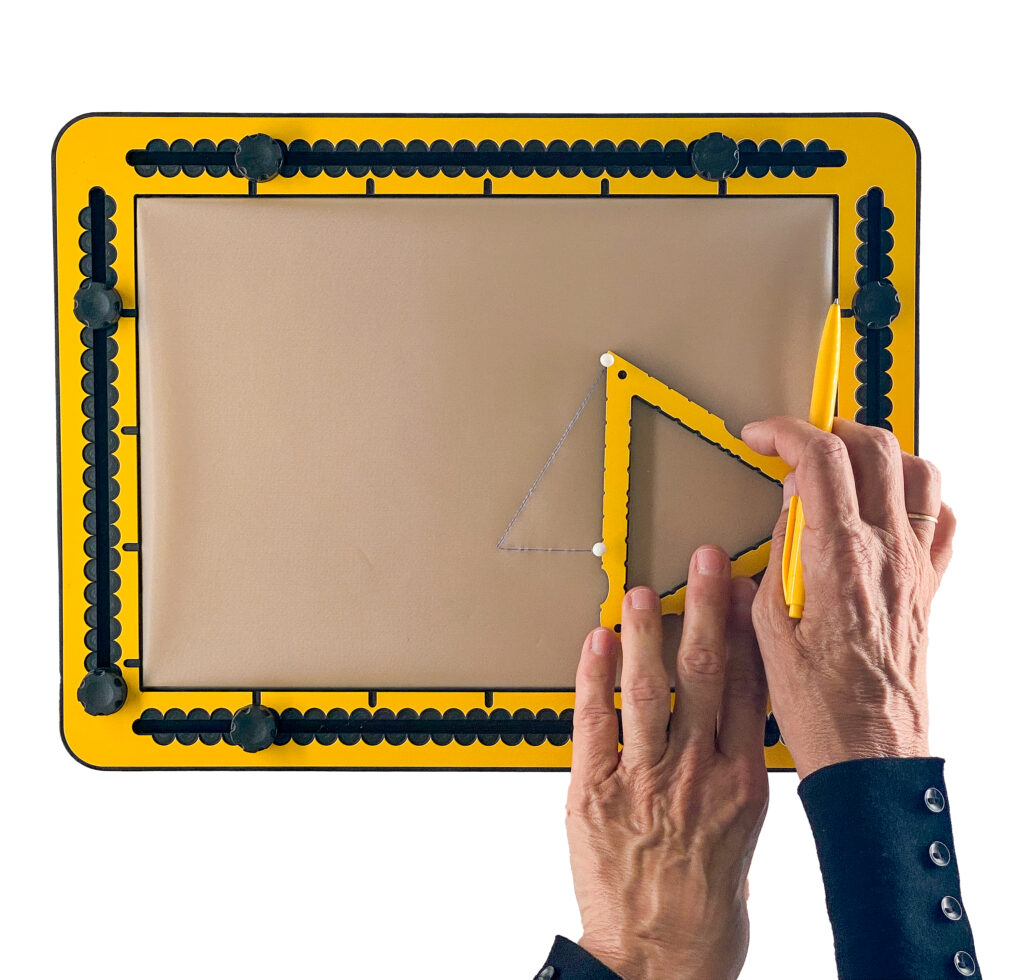
03.7 – Irregular triangle
- Draw a section of one side, not necessarily starting from or ending at a corner of the tool. For convenience you can place pushpins first.
- Mark or place a pushpin in the desired position along one of the other sides.
- Provide lines from the marked position to both line endings.
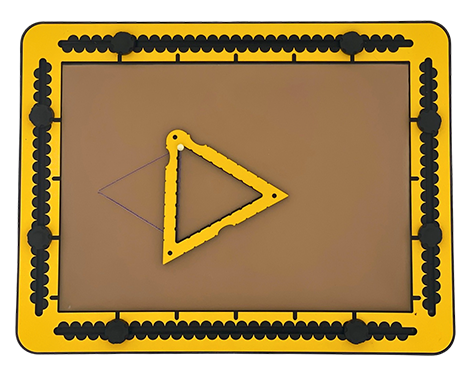
03.8 – Diamond with 60 degrees angle
- Place the triangle on the TactiPad. Draw two of the three sides fully. For convenience place a pushpin in one of the line endings. Rotate it 180 degrees around this pushpin.
- Draw a line from here into the corner. Draw the last line, so the lines connect again at the line ending.
- Diagonals can be provided by drawing the lines between opposing corners.
03.9 – Drawing a house
- For the outline of a traditional house use a square and draw three-quarter of the shape.
- Leave the top side open.
- To draw the roof, use a triangle, preferably a little larger than the square.
- Place this above the walls of the square and draw the inner contour as the top part of the front face.
- Use the smaller square tools to add windows.
03.10 – Fantasy
Draw a triangle and place a pushpin in one of the corners. Rotate the triangle either direction and draw again – a part of – the triangle. Repeat this a few times and change the corner around which you rotate.
03.11 – Four equal sided pyramid
- To start, for convenience, use one of the larger-sized triangle tools. Orient the bottom side horizontally. Draw the inner contour.
- Look for the halfway position on the bottom line (A to B). From here, imagine a line under an angle of 30 degrees and a length of 60% to 70% of the tools side length on this line. Mark this position or place a pushpin there.
- Draw a line from the right corner (B) onto this position. Also draw a line from here to the top of the triangle (T).
- Finally, a dashed line from the left corner (A) to the marked position.
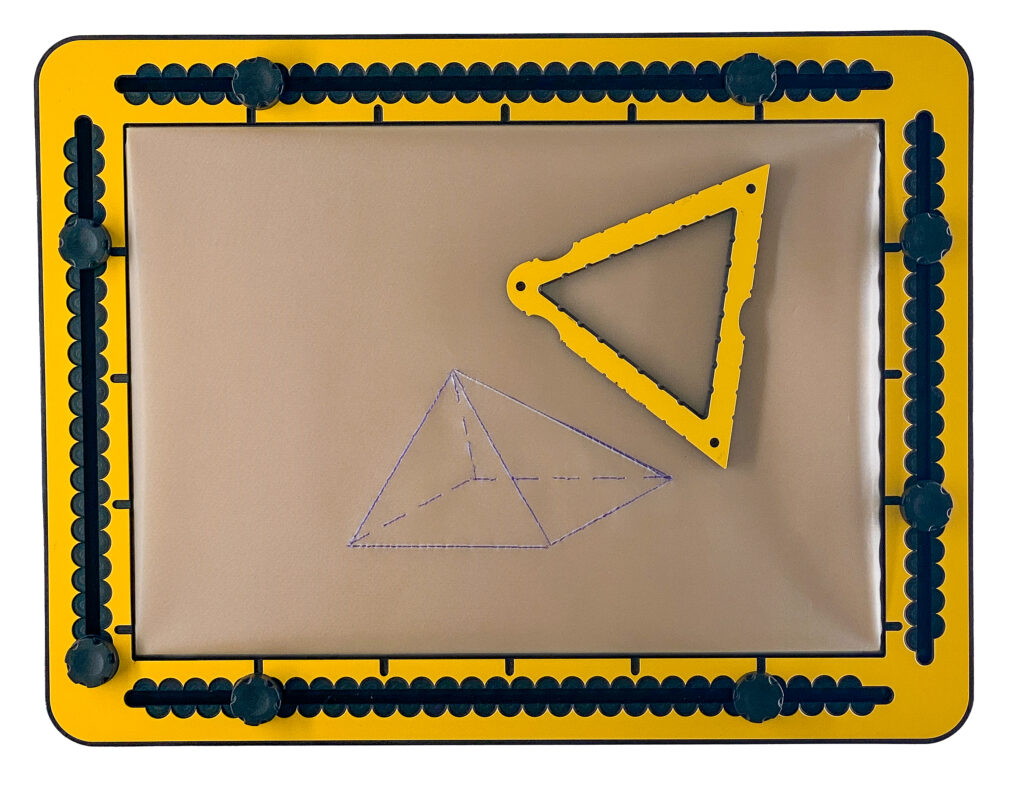
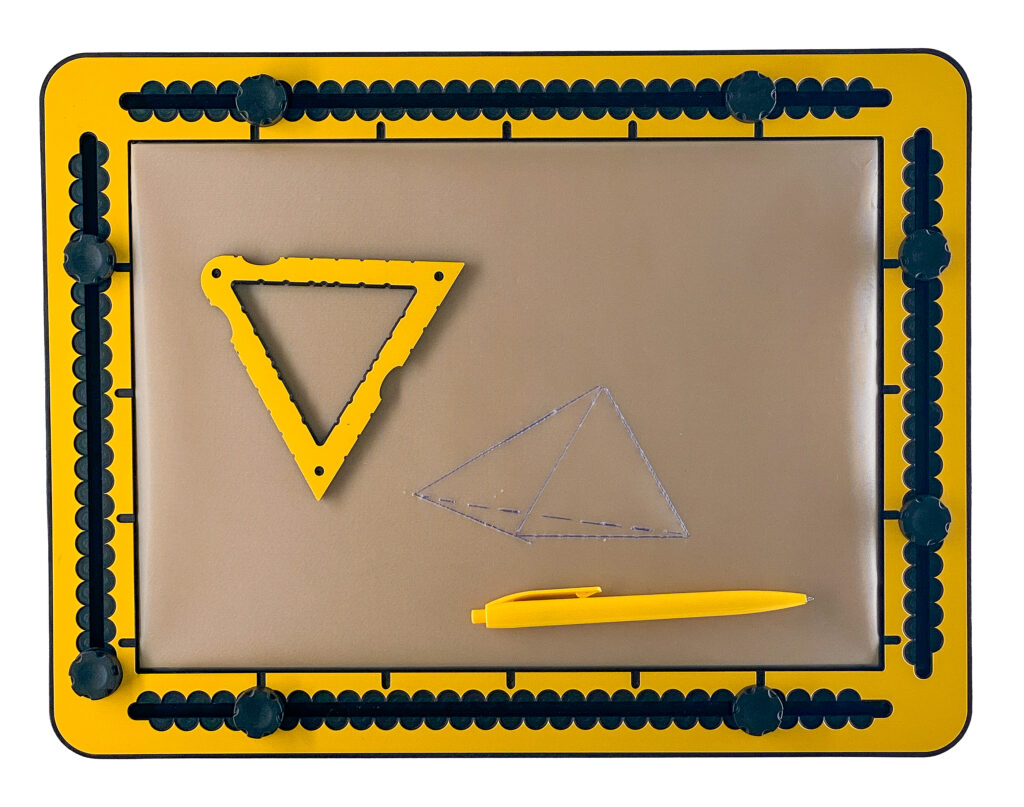
03.12 – Three-sided pyramid (tetrahedron)
- Trace the inside of one of the triangle tools.
- Pick a point a few centimetres to the left of this triangle and mark it with a dot or pushpin.
- Connect this point with a solid line to each of the bottom left and top corner of the triangle.
- Connect this point with a dashed line to the bottom right corner of the triangle to signify this line is invisible.
 Previous section

 Table of content