Skip NavigationMenu

01. Square Tool Manual

Drawing instructions

Square
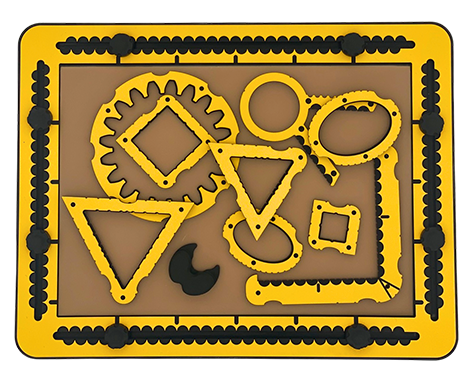
When you position the square somewhere on the TactiPad in any orientation and then draw along the inner contour, you create your first square.

Alignment for horizontal or vertical oriented shapes
Aligning the tool with the ruler that is placed on two opposing TactiPad knobs, will make sure the aligned side is horizontal or vertical, relative to the measurement indications of the TactiPad.

Other shapes
With the square template you can create many more shapes such as a rectangle, triangle, parallelogram, trapezium and also 3D figures like cube or pyramid.

Rectangle 1
Choose the square tool that has the longest side of the rectangle that you want to create.

Draw the bottom line. Determine the width (is height) of the rectangle and draw the left and right line from the same position on to the bottom line. Move the tool downwards so the top side is almost on the line endings of the two (vertical) sides.

For convenience place a pushpin in the positions along the two short sides and draw a line from here to the bottom line.
Move the tool towards you until the top side hits the two pushpins. Draw the top line and remove the tool.

Rectangle 2
For larger rectangles alignment with the ruler works well.
Place the ruler on two knobs. Place the tool against the ruler and draw the bottom line and the left side. Move the tool to the right for as long as you want the length of the bottom line of the rectangle. Draw the rest of the bottom line and also the right side of the rectangle.

Connect the two line endings of the sides with the ruler.
Pushpins in these positions can be handy.

45 triangle – 1/1/sqrt2 triangle
Drawing two connected full sides of the square and the diagonal line between the two line endings creates a rectangle triangle, also known as a 1/1/sqrt2 triangle.
Placing pushpins in two diagonal positioned corners can help to draw the diagonal line.

Right corner triangle
Drawing only parts of two connected sides from the tool and connecting the line endings, will result in a right corner triangle.

Triangle with sides 1/2/SQrt5
Draw a line from a halfway position into a corner. Continue with a line along the full side. Remove the tool. Connect the two line endings.
This is also a right corner triangle with specific proportions for the length of the sides: 1/2/SQrt5.

Isosceles triangle
Draw a line as the base line for the triangle and check the halfway position on this line. Mark or place a pushpin in exact the same position in the opposite side. Connect this top corner position with each of the two line endings of the base line.
Calculating the surface of an isosceles triangle created with a square tool is not too complicated.
The surface is the multiplication of the length of the base line and the length of the side of the tool that is used, divided by two.

Irregular triangle
Drawing – a part of – a side and then marking or placing a pushpin along one of the three other sides and providing lines from this position on to both line endings will create an irregular triangle.

Parallelogram
Draw the bottom side of the square.
Place a pushpin two or three centimetres to the right in the bottom line.
Move the tool to the right until it hits the pushpin. Make sure the tool is still aligned with the bottom line.
Place a pushpin at the desired height position at the inner left side of the tool. Mark or place a pushpin in the right side on the same height as well.
Move the tool downwards until it hits the pushpins. Draw the top side of the parallelogram.
Remove the tool and connect the lines.

Trapezium
Use two different squares, one that has the size of the bottom of the trapezium, and one the size of the top of the trapezium.

Draw the bottom line of the square with the largest square. Take the smaller square and align its bottom line with the line that was created already. Draw the top line of the smaller square. Connect the line endings between the top and bottom line.
When placing the halfway position of the smaller square at the halfway position of the larger square, the trapezium will be symmetrical. Again you can use pushpins to mark specific positions, like line endings or the halfway position.

From a square to a cube
To begin with: draw a square. This square is the front face of the cube.

Draw a second square, the rear face, a little to the right and a little upwards. Make sure the bottom lines of the square stay parallel. Connect each of the four corners with the ones closest of the second square.
As the above is a start, you have to be aware that some of the lines are (partly) invisible. They should be dashed.

So, for a more realistic drawing instruction, each corner is given a character indication.

The lower left corner of the front face square is called A, the one at the lower right B, Going up from there is C and going left is corner D. The rear face has the corner E in the lower left and going counter clockwise F, G and H.

The square of the rear face is partly covered by the front face. So parts of the sides of this square have to be dashed.

The line E-H has to be fully dashed. The line E-F until it crosses the line B-C, the right line of the front face square, has to be dashed. The rest of the line is solid.

Four lines to connect the corners of the two squares completes the cube. Only the line A-E has to be dashed, the others are solid.

About the amount for ‘a little to the right and a little upwards’ can be discussed. A rule of thumb is to imagine a line under an angle of 30 degrees starting in the A corner. Set a distance of 60/70% of the length of the side of the applied square for the E corner.
The 30triangle can also help here.

Pyramid (symmetric)
For a start take the eight centimetres square and equilateral triangle with the same side length.
The base of this pyramid is a parallelogram. The four side faces are triangles. The front face is equilateral.

Draw a parallelogram where the top side is moved upwards and to the right with the rule of thumb in mind; an angle of 30 degrees and a length of 60% of the length of the side.

Dash the left hand side and the top side of the parallelogram because they are invisible.
Place the triangle aligned with the bottom line of the parallelogram where the corners match. Draw the two remaining sides of the triangle where they meet in the top corner T.

The corners of the base (floor) of the pyramid are named A, to D, counter clock wise.
To complete the pyramid, provide a solid line from C to T and a dashed line from C to T.

Taller pyramid
The top of the pyramid can be placed in many positions and the figure will still be a pyramid, but not symmetrical.
To keep it as such, the top T has to stay on the altitude line that arises from the crossing of the diagonals; the lines A-C and B-D, the centre of the parallelogram.
To set the top T, use the ruler that goes across the TactiPad, in equal positions of the frame and also meeting the centre position of the parallelogram.