Skip NavigationMenu

3.01 Backpanel

Closeup of MDA's backpanel, showing the ports and power button.

When looking at the back of the MDA you’ll find 4 different port types as well as the power button. The back panel is where you turn on the MDA and plug in your cables and USB devices.

From left to right you’ll find the following features:

  • USB-B port: This port can be used to connect your PC or laptop directly to the MDA using the USB-B cord you received with the MDA. You only need to do this when using TactileView to send sketches to the MDA.
  • USB-A port × 4: These 4 ports can be used to plug in USB drives to upload images to the MDA. These ports do not support a direct connection from your PC/laptop to the MDA. These ports are also known as “normal” USB ports.
  • Ethernet port: Use this port to connect the MDA to your local network, or the internet. The LEDs on the port will light up when data is being send or received.
  • Power socket: Use this port to plug in your power cord.
  • Power button: This button is used to turn on the MDA. When the MDA is turned on, the centre of the button is recessed and a yellow ring will light up. When the MDA is turned off, the centre of the button is level with the rest of the button and no light can be seen.

3.02 Drawing Arm & Sketching Stylus

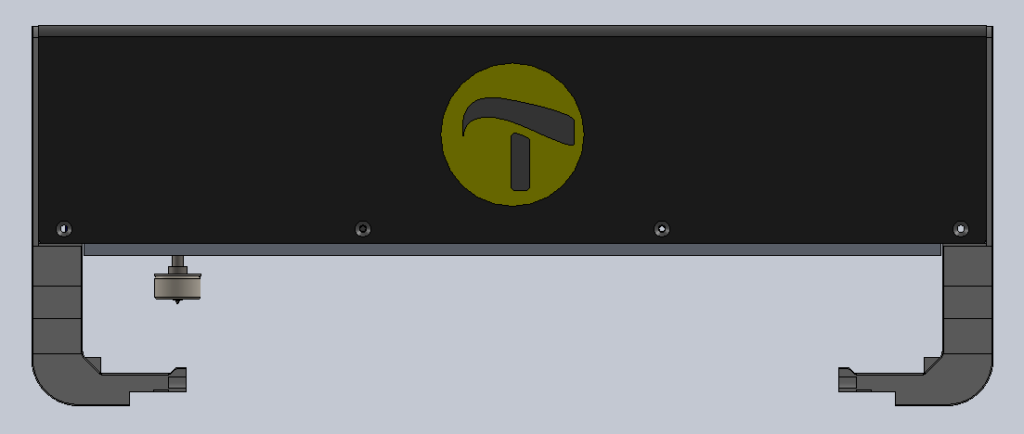
Front view of the MDA's drawing arm with the drawing pen extended.If you move your hands along the longer sides of the MDA you’ll encounter two parts sticking out of the sides of the MDA opposite each other. These are the arm supports. Following these supports upwards you’ll come across the drawing arm which connects the two arm supports to each other. The drawing arm is covered by a black plastic cover which features the Thinkable logo on the front side. The arm moves from the back to the front of the MDA as needed. This is done automatically, so be careful not to get your hands caught by the MDA as this can result in injury.

If you were to reach inside the arm trough the slot in the bottom of the arm (make sure the MDA is powered off) and move your hand from the right all the way to the left you will come across a circular metal object. This is the magnet and part of the drawing stylus. This part moves up and down when the MDA is sketching, so be careful when the MDA is sketching.

If you slide the flat of your hand across the underside of the drawing arm you will feel a small point sticking out. This is the drawing point of the sketching stylus and will be lowered as needed when sketching on the TactiPad.

! Be careful when the MDA is sketching because the arm and pen point will move automatically and can crush your fingers. !

3.04 TactileView Digital Pen Dock

Towards the back, behind the furthest two nocks you’ll find the TactileView Digital Pen Dock. It is about two centimetres in height, eight centimetres wide and has rounded corners. On the back of the dock is a small indentation. This is where you can place the receiver for the TactileView Digital Pen. Simply place the receiver’s magnets inside the indentation and the magnets will click in place. Make sure the wire of the receiver does not obstruct the arm during movement.is not in the way of the arm.