05.1 – Detailed description
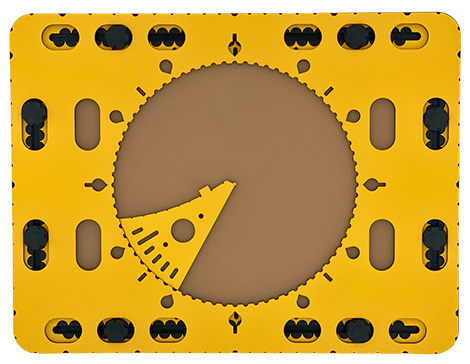
The wedge-shaped drawing tool has a rounded edge that matches the curve of the circle in the CircleFrame. This rounded side covers an arc of 45 degrees. Near the rounded edge, grooves at intervals of six degrees (one minute) are located. A little further away from the edge, a hole is present. Two sides of this tool end in a flattened point. One of these sides is straight and ends in a very small point that serves as a pen blocker. This pen blocker also exactly coincides with the centre of the circle. The straight side forms the radius for the circle. The other side of the wedge is slightly curved inward. This side has small indents at every centimetre. The small block between the indents at 2 and 3 centimetres is used to position the compass base.
To description section
To manual section
05.2 – Wedge tool manual
Make sure the CircleFrame is placed properly on the TactiPad.
05.3 – Drawing pie charts
The wedge tool can be used to draw pie charts, which are often used to present statistical information in fields such as mathematics, economics and geography. The quantity that each sector represents corresponds to an arc of a certain number of degrees. By determining the angle between two radii on the inside of the circle, you can draw the pie chart very accurately. Keep the tool in place with one or two fingers in the hole and press it against the edge of the circle.
Many other mathematical concepts in which degrees and angles play a key role, such as vectors or polar and trigonometric functions, can be explained and drawn using the CircleFrame.
05.4 – Centring the compasses in the CircleFrame.
Another function of the wedge tool is to position the compass in the centre of the CircleFrame. You can achieve this by placing the wedge tool anywhere against the edge of the circle with the compass base against the flattened tip of the wedge. The centre of the compass base now hooks around the pen blocker at the tip of the wedge tool.
By slightly turning the base counter clockwise, it will catch the small protruding block on the curved side of the wedge. This way, the compass base is exactly in the middle of the circle. By removing the wedge tool and placing the compass arm into the base, you can draw a circle precisely in the centre of the CircleFrame.
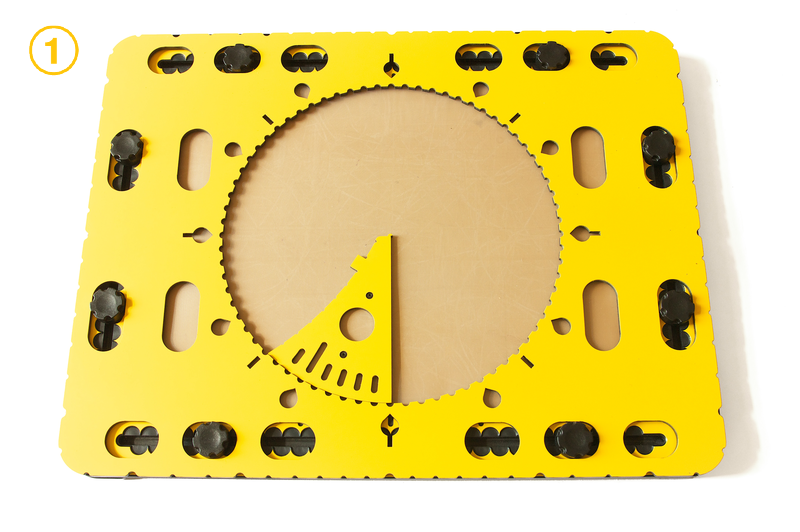
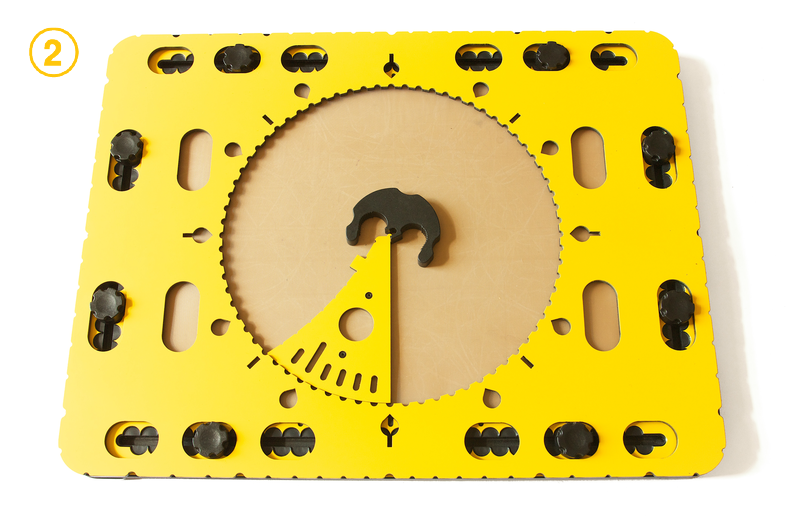
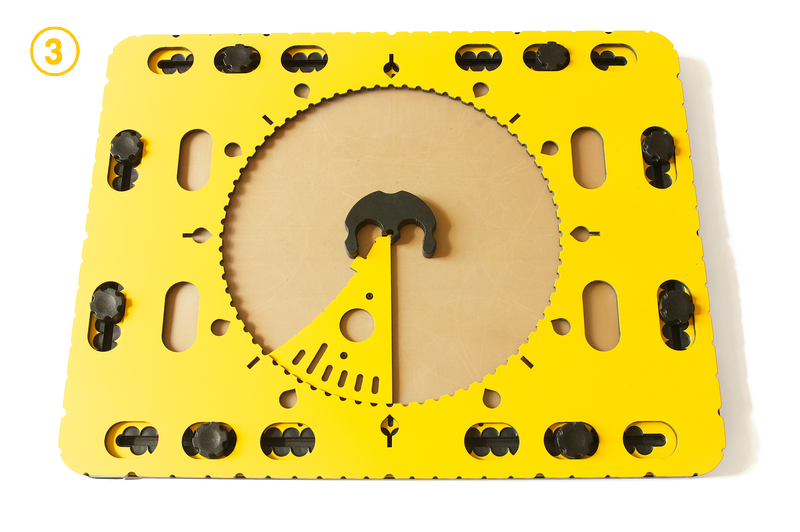
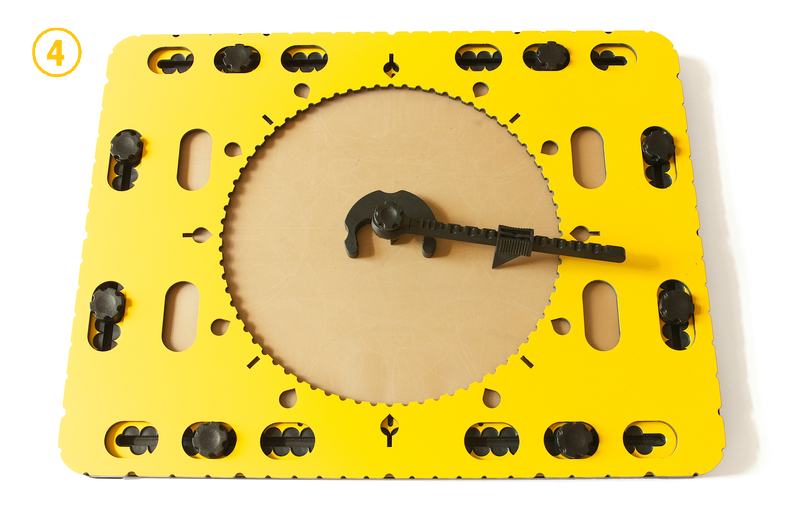
Figure 2. Position the wedge tool along the edge of the circle (step 1), position the compass base and turn it so it rests against the wedge tool (steps 2 and 3) and remove the wedge tool (step 4). The compass is now perfectly positioned in the centre.
05.5 – Drawing the hands of a clock
Around the circle of the CircleFrame, multiples of 30 degrees are indicated by drop-shaped indentations. These correspond to the twelve hours of the clock. To draw a clock hand, you can use the wedge tool. Along the rounded side, you will find grooves at an angle corresponding to 1 minute, or 6 degrees. The longer groove of 2 centimetres indicates the position of 5 minutes or 1 hour later. After placing the wedge tool with the rounded side against the edge of the circle and aligning the straight side with one of the hour indications, you can set the minute and draw the hands of the clock as radii to set the clock to any desired time.
 Previous section

 Table of content