TactiPad – Drawing tools – Art & Science Templates: Rectangular hook / L-shape hook

The rectangular hook / L-shape hook Template

Photo: Rectangular hook / L-shaped hook
Photo: Rectangular hook / L-shaped hook (prototype 3D-print)

Detailed description of the rectangular hook template

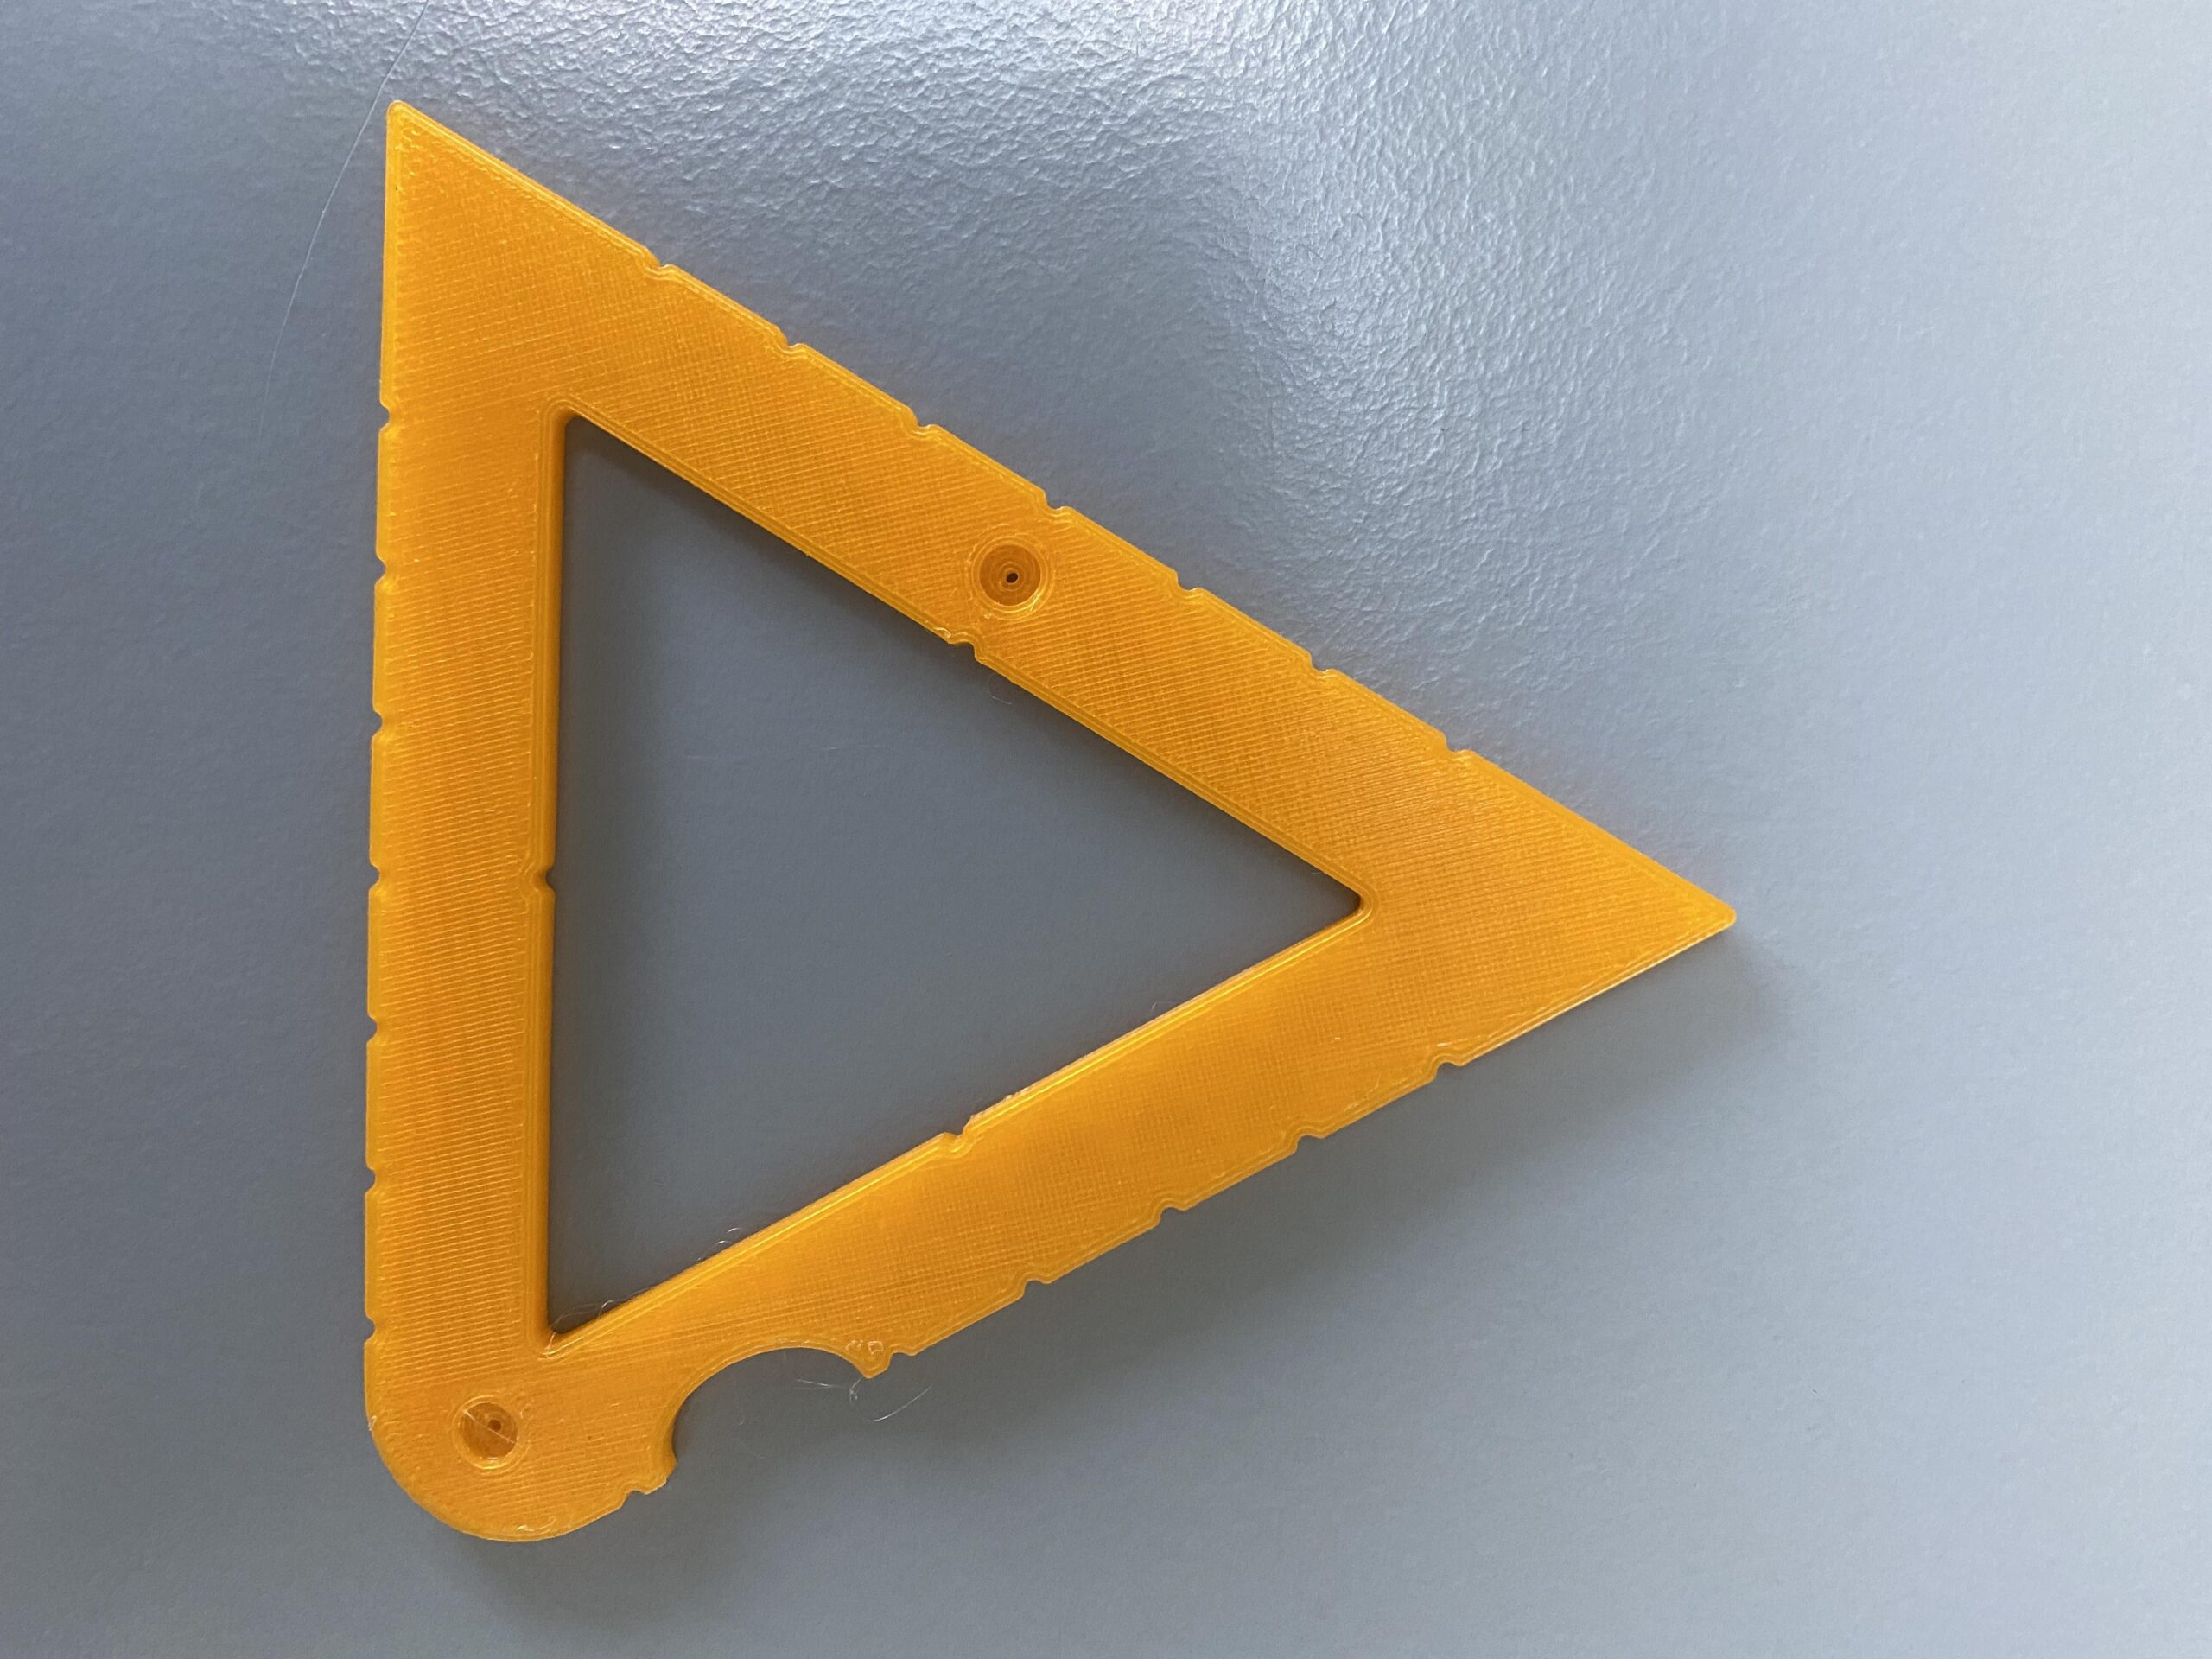
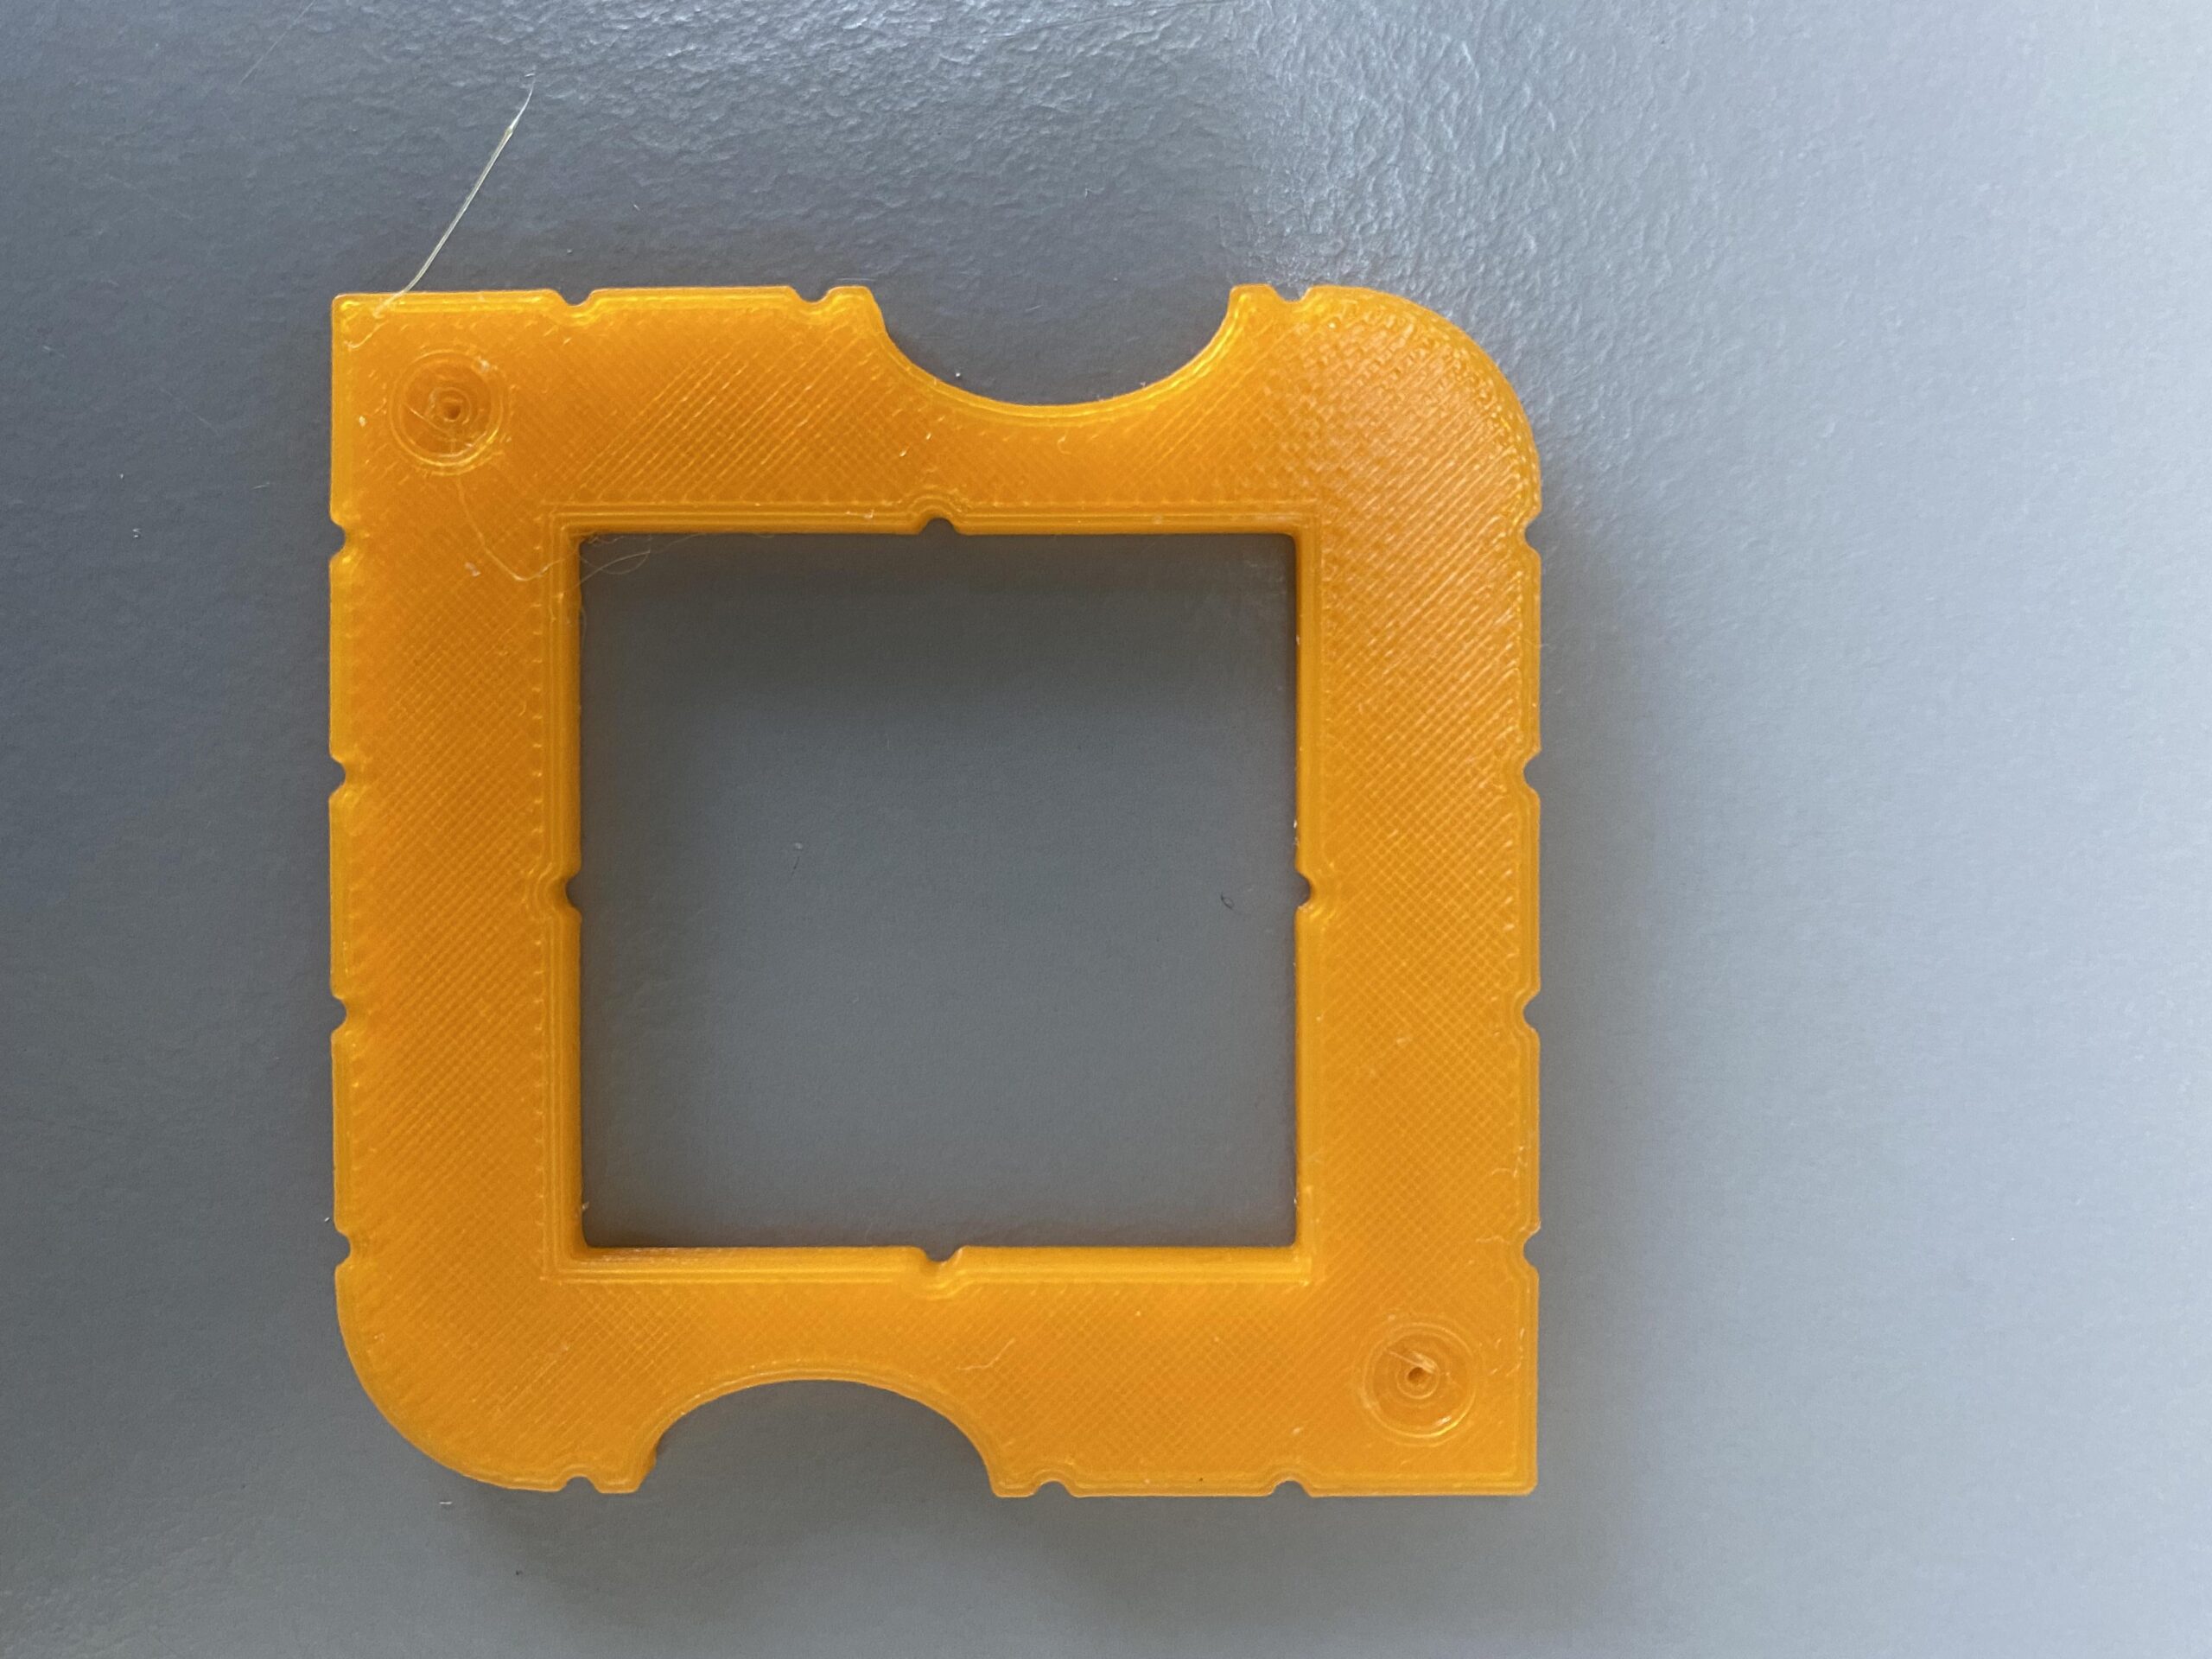
The two sides of the rectangular hook are under an angle of 90 degrees and are 10 centimetres long. The body of the tool is two centimetres wide. The corner between the sides is rounded at the outer side. The sides are ending with a 90 degree hook. Near the rounded corner and near to the tips, you find push pin markers.

You find indents for 30, 45 and 90 degrees at the rounded corner for alignment with the ruler. There are centimetre indicators along the inner side on the top surface. The inner sides have indents every half centimetre. At the outer side you find indents to perform a 30 or 45 degree rotation in reference to the inside angle. On the outer sides, near to the tips you find a finger fitter for easy lifting or extra grip.

Utilising the rectangular hook template

When you drawing along the two sides towards the inner corner you create two lines with a 90 degree angle. When you connect the two endings of the previously created lines you will get an irregular triangle on the TactiPad. By rotating and/or mirroring a triangle, you can create shapes such as diamond or kite.


    What do you think about this? Send us some quick feedback!

    Thoughts? Recommendations? Questions? Just enter some text and submit. If you'd like us to reply, please include your email address.

    TactiPad – Drawing tools – Art & Science Templates: Triangle

    The equal sided Triangle Template

     Photo: The six centimetre equal sided triangle of the set
    Photo: The six centimetre equal sided triangle of the set (prototype 3D-print)

    Detailed description of the triangle template

    The templates for the triangles are of the type equal sided triangle. The length of the sides ranges from three to eight centimetres respectively. One outer corner is rounded, the other two are sharp. Along the outside you find indents at every centimetre. They correspond with the corners at the beginning/ending of the inner sides. The body of the triangle is about 12 millimetres wide. On the top surface, you find pushpin markers.

    The inner sides have an indent at their halfway position.

    On one of the outer sides you find a finger fitter for easy lifting or extra grip.

    Utilising the triangle template

    When you place the triangle template somewhere on the TactiPad in any orientation and then draw along the inner contour, you create your first triangle.

    With the equal sided triangle you can create other shapes: a rectangular triangle of 30, 60 or 90 degrees, a diamond and star.


      What do you think about this? Send us some quick feedback!

      Thoughts? Recommendations? Questions? Just enter some text and submit. If you'd like us to reply, please include your email address.

      TactiPad – Drawing tools – Art & Science Templates: Square

      The Square Template

      Photo: The four centimetre square of the set
      Photo: The four centimetre square of the set (prototype 3D-print)

      Detailed description of the square template

      The sizes of the squares ranges from two to ten centimetres. The frame that forms the square is one centimetre wide. So a four centimetre squared template has the inner dimension of four centimetres. The outside is six centimetres in square.

      Two diagonal opposite outside corners are sharp, there you can find the pushpin. The other two corners are rounded. Along the outside a small indent is provided at every centimetre. The inner side has an indent at the halfway position of each of the four sides. In two of the opposing outer sides you find finger fitters for easy lifting or extra grip.

      Utilising the square template

      When you position the square somewhere on the TactiPad in any orientation and then draw along the inner contour, you create your first square. With the square template you can create many more shapes such as diamond, parallelogram, trapezium, and also 3D shapes such as pyramid or cube.


        What do you think about this? Send us some quick feedback!

        Thoughts? Recommendations? Questions? Just enter some text and submit. If you'd like us to reply, please include your email address.

        01. Digital Pen – Introduction


        Note: Since summer 2022, the Digital Pen has not been for sale anymore. This manual is for users who still own this former Thinkable product.


        The TactileView digital pen is a special version of a ballpoint pen. The pen writes in ink like a normal pen, but at the same time determines the position of its tip on the drawing surface. In the pen’s tip is a small transmitter, which sends a signal to a receiver. Upon moving or clicking in the drawing surface with the pen, the receiver transmits this position to the TactileView software, just like with a regular computer mouse. Visual impaired people can operate the TactileView software using the TactiPad or TactileView ClickPad.

        The pen functions as a drawing tool and transmits to the computer what has been drawn, or as a cursor by transmitting on which location has been clicked. This way, the digital pen enables the user to make a digital version of a tactile diagram or to explore a tactile diagram with speech and sound.

        TactileView Digital Pen

        01. ClickPad – Audio-tactile images – Introduction

        The TactileView ClickPad is a clipboard, on which a tactile image is placed. Combined with the TactileView digital pen and the TactileView software, the ClickPad functions as a touch screen. On this, a VIP (Visually Impaired Person) can explore an audio-tactile image; a tactile image that contains audible information as well. The digital pen is used as a click and point device similar to a computer mouse, and tells the computer on which position of the image has been clicked. The software then plays any audio information that is present at the clicked position.

        04. GraphGrid – Coordinate system

        This video shows how you can create two- and three-dimensional space on the TactiPad by using rubber bands placed diagonally around the frame of the GraphGrid.

        01. GraphGrid – Introduction

        This video shows the characteristics of the GraphGrid, the accompanying drawing tool and how it can be placed on the TactiPad drawing board.

        14. CircleFrame – Repeating templates

        By making different cardboard templates you can draw elegant repeating and overlapping patterns. This video shows how the small triangle can be used as a reference to make your own templates.

        Item added to cart.
        0 items - $0.00