 Previous section
 Return to TactileView manual overview
You can activate one of the filters by selecting ‘Filters’ icon in the left vertical toolbar, or selecting one from the Filters menu. For some of the filters, a horizontal slider allows you to adjust the extent in which it is applied. The filters are applied to the entire design and will fuse all objects in the design.
You can also apply filters to a selected area only, without affecting the rest of the design; see ‘Select area; editing parts of the design’. Please note: in the images on this page, the filters are only applied to the right-hand side of the image to show the effect compared to the original image on the left.
One way to process the image so that it can better be embossed is to convert it to a line drawing. Select the Convert to Line Drawing option from the Filters menu. A slider bar will appear in the upper left corner of the screen. Drag the slider left or right until the image looks as desired.
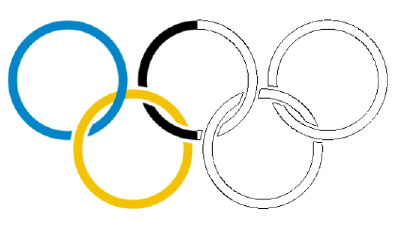
Figure 1. ‘Convert to line drawing’ filter.
‘Filter: convert to line drawing’ icon: ![]()
Some images can come out better when converted to black and white rather than to a line drawing. Select the Convert to Black and White option from the Filters menu. A slider bar will appear in the upper left corner of the screen. Drag the slider left or right until the image looks as desired.
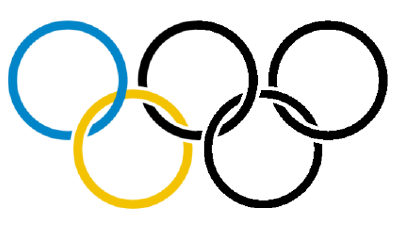
Figure 2. ‘Convert to black and white’ filter.
‘Filter: convert to black and white’ icon: ![]()
Use this filter to increase or decrease line thicknesses in the image all at once. If your image contains a lot of light, thin lines or a dark, thick lines, this filter is helpful to make them all thicker or thinner at the same time. Select Change Line Thickness from the Filters menu. When the slider appears at the upper left corner of the screen, slide it to the right to make lines thicker or to the left to make them thinner.
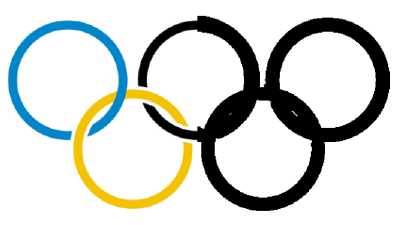
Figure 3. Thicker lines by applying the line thickness filter.
‘Filter: change line thickness’ icon: ![]()
This option allows you to add outlines around each different colored area in an image. Contours (black lines) are added at the transition point between one color and another and the thickness of the contour lines is controlled using the slider that appears at the upper left corner of the screen when you select the filter. This filter can be helpful for simple drawings that have well-defined areas in distinct colors, but is less useful when applied to photos or other images where color fades from lighter to darker without a distinct transition point.
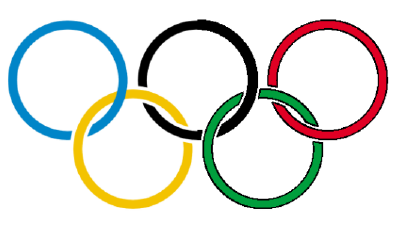
Figure 4. ‘Add contours’ adds black contour lines to changes in colour in the image.
‘Filter: add contours’ icon: ![]()
The use of this filter lets you soften or sharpen edges between areas of color in an image. Select Blur the Image from the Filters menu, then use the slider that appears at the upper left corner of the screen to adjust the image. Sliding the slider right will soften edges and sliding it left will sharpen the edges.
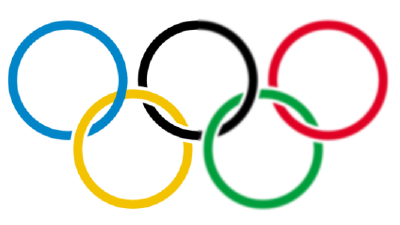
Figure 5. Right-hand side of the image is blurred with the ‘Blur image’ filter.
‘Filter: blur image’ icon: ![]()
This filter is mostly used to remove certain colours in the image by converting them to white or black. In the dialog that appears, you can select which colour should be replaced from the list of colours that are present in the design. You can also adjust the colour range to include similar shades in the colour replacement. Once you are finished replacing the desired colours, click ‘OK’ to confirm the changes.
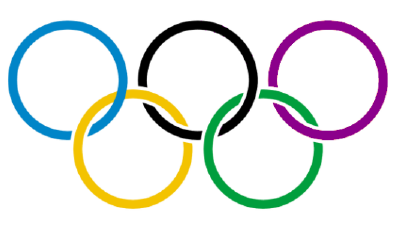
Figure 6. The red colour in the last olympic ring has been replaced by a dark purple colour.
‘Filter: blur image’ icon: ![]()
This option is mostly used when an image has a lot of black area. Choosing Negative from the Filters menu will exchange all colors in the image file with their opposites. Black areas become white, blue areas become orange, red areas become green, etc.
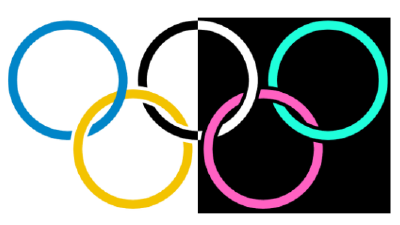
Figure 7. ‘Negative’ filter applied to the right-hand side of the image.
‘Filter: negative’ icon: ![]()
To rotate the entire image, select either ‘Rotate Clockwise’ or ‘Rotate anticlockwise’ from the Filters menu. The image will rotate 90 degrees in the direction you selected.
To mirror the image, select ‘Mirror Horizontally’ or ‘Mirror Vertically’ from the Filters menu. Mirroring horizontally flips the image left to right, like turning a page in a book. Mirroring vertically flips the image upside down, like turning a page in a wall calendar.
To scale the image, select it and then drag the blue square in the lower right corner of the design area diagonally to scale the image smaller or larger.
‘Filter: mirror horizontally/vertically’ icon:
‘Filter: scale design’ icon:
‘Filter: fuse all objects with bitmap’ icon: