We know sections like this are often skipped — but taking a few minutes to read it now can help you use the MDA safely and solve issues quickly.
Contents
09.1 – Safety
09.2 – If the MDA does not start sketching
09.3 – USB-drive not recognised
09.4 – Wired internet connection issues
09.5 – Raised line height / paper damage
09.1 – Safety
Please follow these safety instructions whenever using the MDA:
- Keep clear of the MDA while it is operating.
- Do not place your fingers into the side openings of the device.
- Do not insert fingers into the opening underneath the arm.
- Do not touch the magnetic pen tip.
- Keep magnetic-sensitive items away from the pen tip (such as bank cards, watches, storage media, or medical devices).
- The motors are not especially powerful, but moving parts may still cause injury if fingers become trapped.
Important: Only operate the MDA on a stable, flat surface with sufficient space around it.
09.2 – If the MDA does not start sketching
If a file does not draw as expected:
- Check that the file format is supported (SVG).
- Ensure the file is not damaged or corrupted.
- Try a simpler image with fewer paths or details.
If the issue continues, test with a different SVG file.
09.3 – USB-drive not recognised
If the MDA does not detect the USB-drive:
- Remove the drive and insert it again.
- Try a different USB port.
- Try another USB-drive.
- Check that the drive is formatted correctly.
- Make sure the files are stored in a supported SVG format.
If possible, test the USB-drive on another computer first.
09.4 – Wired internet connection issues
If using a wired network connection:
- Insert the Ethernet cable before switching on the MDA.
- The device checks for a wired connection during start-up.
- If the cable is connected after start-up, the connection will not be recognised.
For full instructions on network setup, see section 06 Wired or Wireless Network.
09.5 – Raised line height / paper damage
The Z-motor inside the arm moves the pen up and down. When the drawing tip touches the TactiPad surface, the motor stops automatically and power is switched off. From now on the magnet pulls the pen tip on to the paper.
A few factors influence the quality and height of the raised line:
- The TactiPad surface is made from natural rubber, which may vary slightly in elasticity and thicknes.
- The drawing tip is precision-made, but small differences can occur.
- During sketching, the tip glides across the paper surface.
Because of these factors, lines may sometimes become too low, uneven or too high, Even Up to the point the paper is damaged. This can be corrected by ‘shortening’ the exposed drawing tip.
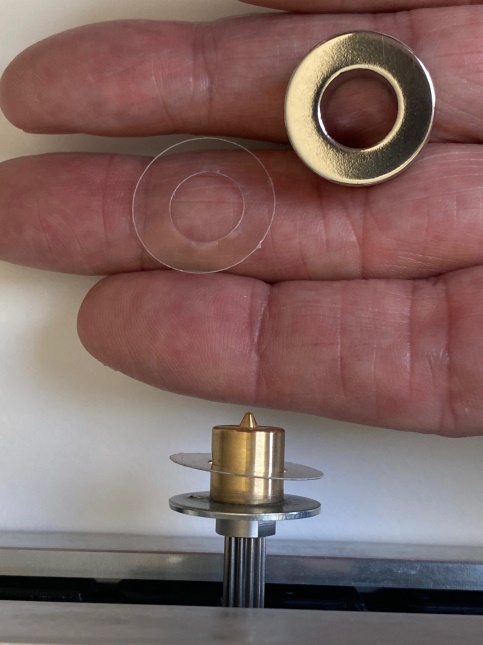
Pen tip components
The pen tip consists of four parts:
- A metal washer on the motor shaft.
- The drawing tip, 1 cm in diameter.
- A ring-shaped magnet with a hole of 1 cm in the middle.
- Thin plastic or paper shims placed between washer and magnet.
Understanding line height / adjusting with shims
A shim has the same diameter as the ring, which is 2 centimetres. In the middle is a hole of 1 centimetre wide. The shim fits around the centre drawing tip.
You may make replacement shims yourself from thin paper if required.
Thin shims can be added or removed to adjust how far the tip extends. Maybe counter-intuitive, but:
- More shims = lower raised lines.
- Fewer shims = higher raised lines.
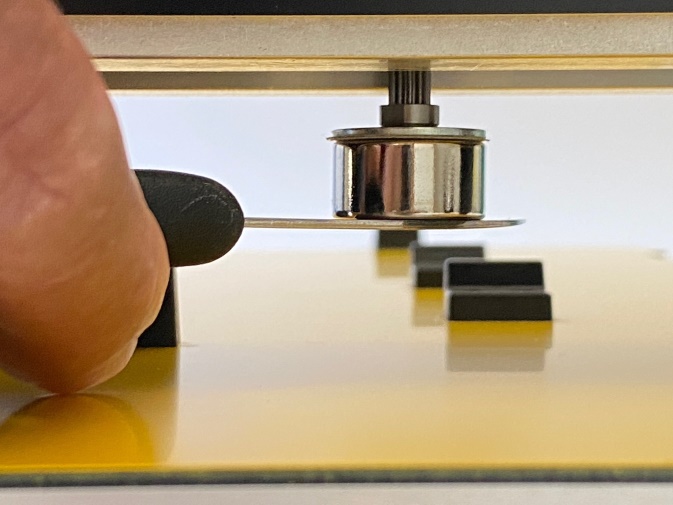
Placing shims / removing the magnet
Take care when handling the magnet.
To remove the magnet, use a thin metal blade such as a knife.
- Reach underneath the arm where the pen tip is located. Move it to the middle of the arm for easier operation.
- The blade will be attracted to the magnet. Pull the knife/magnet downward.
- Carefully insert the blade edge between the washer and magnet and gently lever the magnet downwards.
- Remove or add shims as needed around the centre drawing tip.
- Replace the ring magnet onto the centre drawing tip / washer.
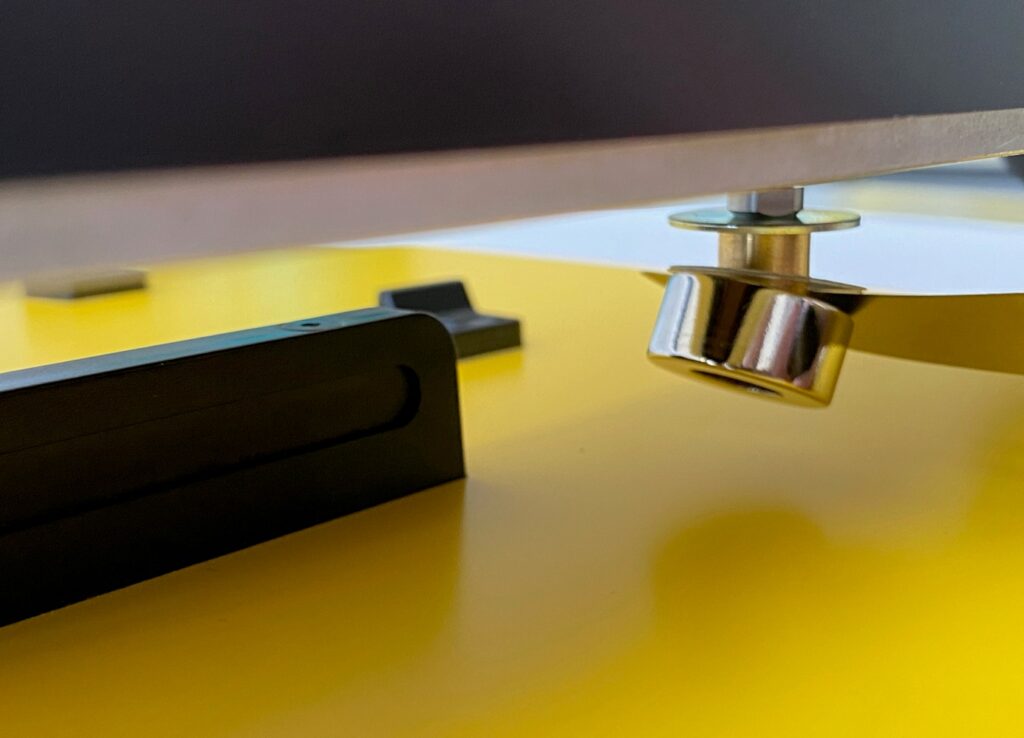
Caution: The magnet may snap back into place suddenly.
 Previous section

 Table of content