Download PDF manual
Introduction
- 1.01 TactiPad – General Characteristics
- 1.02 TactiPad – Frame Characteristics
- 1.03 TactiPad – Drawing Tools
- 1.04 TactiPad – Storing everything
- 1.05 TactiPad – Dimensions
The TactiPad is a drawing board with which you can make raised line drawings as VIP (Visual Impared Person), or have others make raised line drawings for you. The drawing happens on a thin plastic sheet placed on a rubber subsoil.
Working with the TactiPad
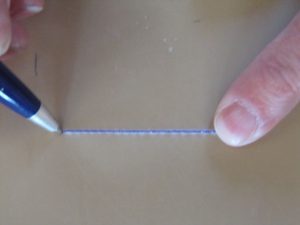
Upon firmly pressing the sheet with either a pen or any other pointy device, a raised line will develop. This is a very old technique, which makes use of the so-called ‘emboss’ effect, meaning the plastic sheet will be stretched by the tip of the pen. The transformations can not be undone. In other words: don’t bother bringing your eraser.
General characteristics
The TactiPad is made of plastic, so that it won’t feel cold. The corners are rounded. The size as well as the measure designation are based on commonly used values. The use of the colors black and yellow provides us with a good contrast between different parts. The Tactipad is flat, and therefore easy to take with. Two grooves have been made at the backside, to make it possible to hang the TactiPad just like a picture frame.
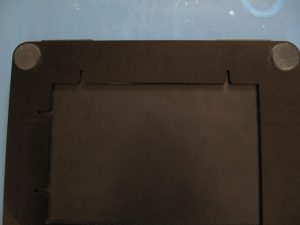
Drawing surface of the TactiPad
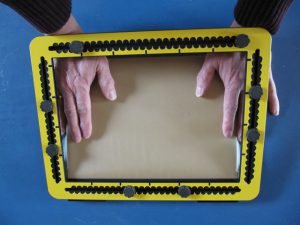
The surface on which can be drawn, has exactly the size of an A4 paper sheet (29,7 x 21,0 centimeters). The surface exists out of a 4 milimeter thick rubber layer. Below this layer is a thin metal plate. Around the drawing surface is a 3,5 centimeters wide fame, in which a groove and a measure designation are placed.
At the frontside of the TactiPad (with the stands pointing to the back), the bottom layer has been shaped inwards, as compared to the frame. By placing your thumb under the edge, and pressing on the drawing surface with your fingers, the frame can be lifted. When closed, the frame exactly surrounds the drawing surface, and is just as high. The plastic sheet which is used to draw on maesures 34 * 27 centimeters, and is tightened under the frame since it’s larger than the drawing surface itself. To keep the TactiPad closed, two flat magnets are placed on the corners of the drawing board, pulling the frame and drawing surface together. This way the sheet is held in place.
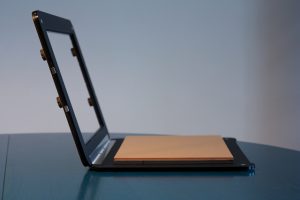
Placing the drawing sheet
On one of the long sides of the frame, a hinge is placed to make the frame fall exactly in place. When opened the frame rests on two short stands, while leaning a bit back. In this position, a sheet can easily be placed. It is not required to lay perfectly straight to fit under the frame. The sheet should be smoothed out by moving both hands out of each other while pressing the sheet, while the frame rests on the hands and falls in place as soon as the hands are removed. The sheet should be placed on the drawing surface as smooth as possible.
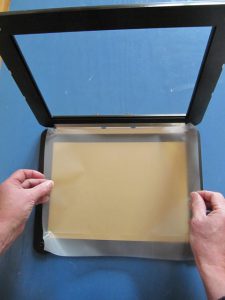
The frame
Grooves have been made in each of the four sides of the frame. In every groove are two moveable knobs, to which the drawing tools can be attached. The graduation, which is at all sides of the frame, indicates 5 centimeter distances (little slots next to the drawing surface), indicates every centimeter at the inner side of the groove, and every 0,5 centimeter at the outer side of the groove.
The origin for the measure designation is located in the upper left corner (when having the hinge pointing to the left or back). The edge of the frame is 3,5 centimeters wide. The diameter of the knobs measures 2 centimeters, and they are placed 1 centimeter away from the outer edge of the frame.
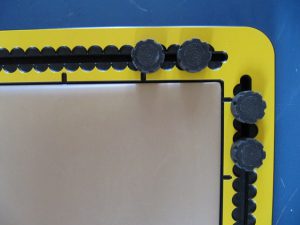
Measure designation
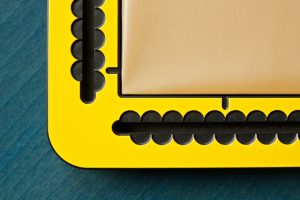
For measure designation in centimeters, 9 millimeter wide semi-circular hollows have been made on a short distance from the edge. They create points between them, each with a distance of 1 centimeter to the next. With those points, it becomes easy to read the exact distance per centimeter. Because the hollows are semi-circular, the distance per 5 milimeters can be read in the deepest point of the hollow. The measure designation can be found at all edges of the drawing surface and on the drawing tools. An exeption is the round edge of the protractor. Here the points between the hollows don’t indicate 1 centimeter, but indicate the angle in steps of 10 degrees instead.
Knobs and holes
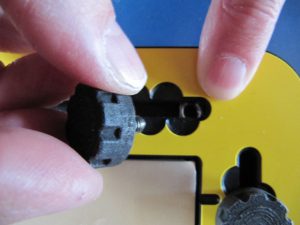
Black ribbed knobs can be moved through the grooves by (un)screwing them. The knobs are 2 centimeters wide and 8 milimeters high. They can be removed by totally unscrewing them. To place a knob back in the groove, place it on a random place in the groove, and slide it all the way to the outer corner, dragging the nut along. Here the knob can be screwed again.
The drawing tools have holes and wide grooves, to fit around the knobs. By fixing the knob and putting the tool over it, the tools can be tightened. With partially unscrewed knobs, the tools can smoothly be moved across the drawing surface.
Drawing tools
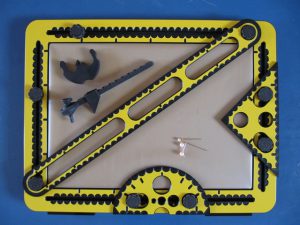
For drawing straight lines, or certain angles , a ruler, a set square, and a protractor are required. The ones included with the TactiPad are specially designed, and have 2 centimeter wide holes and grooves to exactly fit over the knobs on the frame. Apart from that, the drawing tools are made with a rubber underside, which prevents them from slipping over the drawing surface.
The ruler
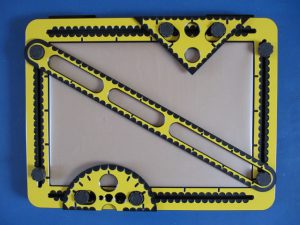
The ruler’s width is 4 centimeters, and it reaches 43 centimeters long. With this length, it stretches diagonally all the way over the entire drawing surface. At one end of the ruler, a 2 centimeter wide round hole is made. In the rest of the ruler there’s a 2 centimeter wide groove. The hole and groove function to fixate the ruler in any direction across the drawing surface, by screwing the knobs.
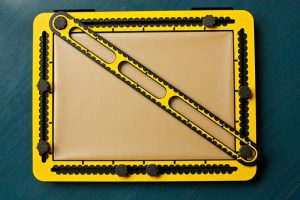
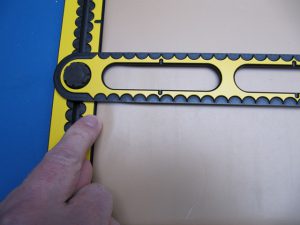
Little slots indicate the 5 centimeter distance in between. The ruler has a measure designation on both sides, for a length of 35 centimeters. When horizontally or vertically placed, with the hole over a knob, the zero of the ruler is on the edge of the sheet. For drawing a line at a precise position, take in account that the rulers edge is 1 centimeter wide.
The set square
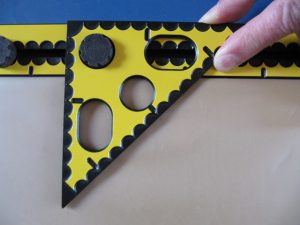
The rectangular 45-degrees triangle has the same measure designation as the drawing board. The two short sides have a measure designation of 10 centimeters, while the long side has a measure designation of 14 centimeters. An indication on the middle of the long side makes it easy to draw a perpendicular.
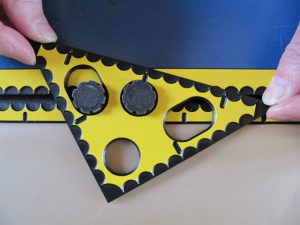
There are four holes in the set square for fixing it over the knobs. The round hole in the 90 degree corner fits around a knob.
By putting one of the short sides of the triangle aligned with the edge of the frame, the set square creates two angles on the board, one of 90 and one of 45 degrees.
Protractor
The protractor makes half a circle with a 7 centimeter radius. In the middle of the straight side a 2 centimeter wide semi-circular hole has been made, to fix the protractor on a line, or combine it with the ruler or a knob. On the round side, per ten degrees there is a little point as indication. In the round edge it also has small notches, for precisely placing the pen. Little slots on the top suface indicate the 30, 45, 60 and 90 degrees angles.
There are round holes of 0.5, 1, 1.5, 2 and 2.5 centimeters in diameter, to easily draw circles this big.

Compasses
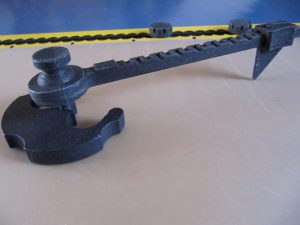
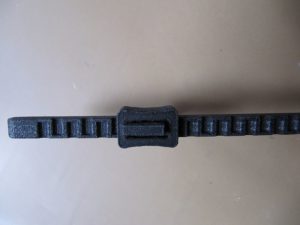
The compasses exists out of two parts: a branch, with a turnable compass spike and a point for drawing the circles, and a base to keep the compass spike in place. Three magnets in the base keep the compass tight to the board using the metal layer below the drawing surface.
The base consists of half a circle with a diameter of almost 6 centimeters, with three little legs pointing out, that way looking a bit like a round capital E. The middle leg has the shape of a triangular arrowhead of which one corner has been cut out. The arrowhead can be used to precisely place the middle of a circle on a specified point in the drawing.
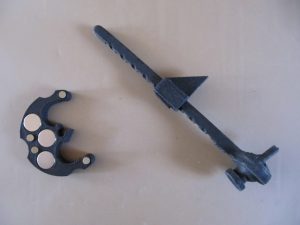
The branch can be moved around the base clockwise and counterclockwise just above the sheet. By slightly tilting the branch it becomes easier to draw a circle with the point
Using pins
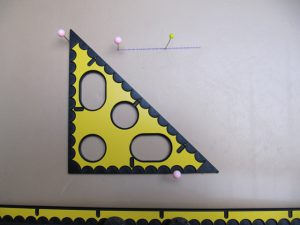
The rubber layer is 4 milimeters thick, which is necessary for sticking in pins. Pins can be used for precisely positioning the drawing tools, or to mark a certain point on a line which could otherwise be covered.
Storing everything
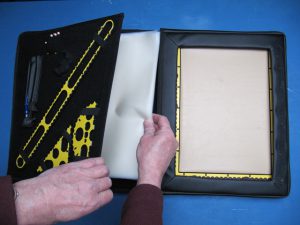
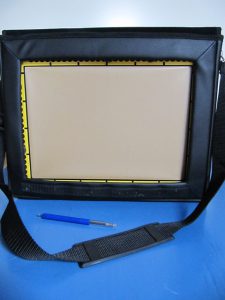
The TactiPad with all its parts can be stored in a case with a handle and a shoulder strap. A special compartment is available for storing the plastic sheets. This compartment is closed by a velcro strap which prevents the sheets from moving during transport. The compartment is below the inner side to which the ruler, set square and protractor are attached using rubber bands. The same rubber bands also keep the compass’ base in place.
