Previous section
 Return to TactiPad manual overview
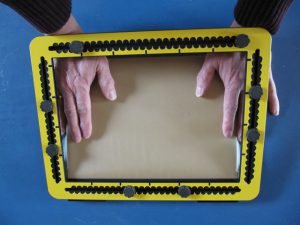
The frame
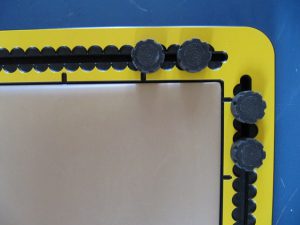
The TactiPad has rails on each of the four sides of the frame. In every rail two moveable knobs are mounted. You can attach the different TactiPad drawing tools to the knobs, and slide them along the rails. The measure designation, which is at all sides of the frame makes it possible to position the tools precisely. Grooves next to the drawing surface indicate 5 centimeter distances. The semi-circle hollows along the rails indicate centimeter and 0,5 centimeter distances. The hollows on the inner side and those on the outer side of the rail have the same width but are lined up differently. This allows you to measure 0,5 centimeter distances.
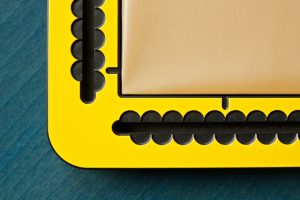
Measure designation
For measure designation in centimeters, 9 millimeter wide semi-circular hollows have been made on a short distance from the edge. They create points between them, each with a distance of 1 centimeter to the next. With those points, it becomes easy to read the exact distance per centimeter. Because the hollows are semi-circular, the distance per 5 milimeters can be read in the deepest point of the hollow. The measure designation can be found at all edges of the drawing surface and on the drawing tools. An exception is the round edge of the protractor. Here the points between the hollows don’t indicate 1 centimeter, but indicate the angle in steps of 10 degrees instead.
Knobs and holes
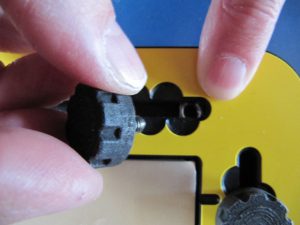
Black ribbed knobs can be moved along the rails by (un)screwing them. The knobs are 2 centimeters wide and 8 milimeters high. They can be removed by totally unscrewing them. To place a knob back in the rail, place it on a random place in the rail, and slide it all the way to the outer corner, dragging the nut along. Here the knob can be screwed back again.
The drawing tools have holes and wide grooves, to fit around the knobs. By fixing the knob and putting the tool over it, the tools can be tightened. With partially unscrewed knobs, the tools can be moved smoothly across the drawing surface.