In TactileView, there are various ways of creating a tactile design, depending on the type of content you wish to create. For certain types of designs, specialised modules have been included in the software.
All 7 methods described below can be combined whenever needed in your designs.
1. Use premade designs from the TactileView catalog
The TactileView catalog contains thousands of premade designs, ready to be printed and used. Designers have uploaded the tactually usable designs they created. You can search for a particular design that you want to use, download it and make modifications needed before you produce them.
You can visit the TactileView designs catalog by selecting ‘Download and edit design from catalog’ from the Portal menu, or by clicking on the catalog icon in the top menu bar.
‘Download and edit design from TactileView catalog’ icon: 
2. Convert images from the internet
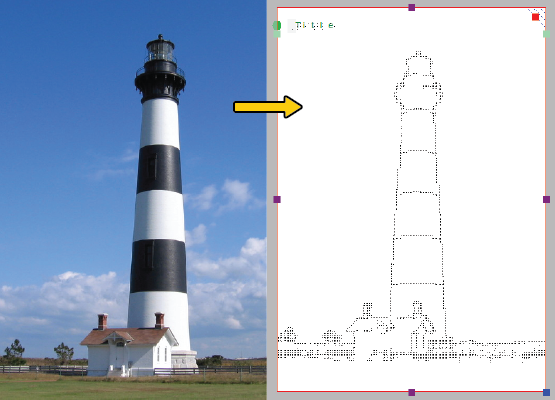
On the internet you can find an almost endless amount of images, many of which are suitable for production as tactile graphics. For some images only a minimum of effort is needed to adapt the image. By selecting the right image as a source, such as a line drawing instead of a more complex photo, a simple combination of applying filters and minimal use of retouching tools can be sufficient.
On the internet you can find an almost endless amount of images, many of which are suitable for production as tactile graphics. For some images only a minimum of effort is needed to adapt the image. By selecting the right image as a source, such as a line drawing instead of a more complex photo, a simple combination of applying filters and minimal use of retouching tools can be sufficient.

Figure 1. Tactile diagram based on an image found on the internet.
3. Convert scanner and webcam images
Images taken with a webcam or scanner can be used as a source for a tactile graphic. In most cases, the images that you scan or photograph will need to be processed for tactile use. By combining the filters and retouching tools, colours can be removed and the image converted to a line drawing. In the settings menu you can configure the setup for a scanner or webcam for the software.
Images taken with a webcam or scanner can be used as a source for a tactile graphic. In most cases, the images that you scan or photograph will need to be processed for tactile use. By combining the filters and retouching tools, colours can be removed and the image converted to a line drawing. In the settings menu you can configure the setup for a scanner or webcam for the software.
‘Activate webcam’ icon: 
‘Quick scan with scanner’ icon:
‘Quick scan with scanner’ icon:
4. Create a design from scratch
With the series of drawing tools in the left vertical toolbar, a design can be partially or completely drawn from scratch in a blank design. This method often requires a little more effort than the previous three, but it gives the most flexibility in case no suitable images are available as a basis for your design.
Most designs require a combination of different drawing tools. The objects (indicated in blue) for example, give great precision and access to convenient properties such as textures. Text in the correct braille table can be added anywhere in the design as clarification. Special symbols can easily be added from the figures library.
5. Create graphs based on an equation
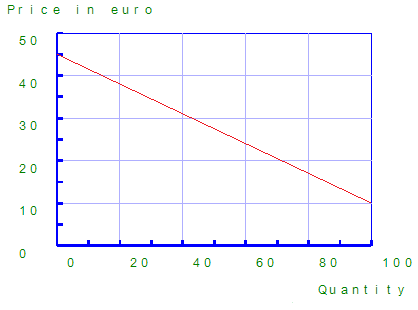
Graphs are widely used in mathematics and many other subjects, but there are a lot of factors that determine the tactile usability of a graph. The mathematics module in TactileView will help you to easily create a graph based on any given equation. This module can be accessed by selecting the Graphs menu or the Graphs icon in the left toolbar.
Graphs are widely used in mathematics and many other subjects, but there are a lot of factors that determine the tactile usability of a graph. The mathematics module in TactileView will help you to easily create a graph based on any given equation. This module can be accessed by selecting the Graphs menu or the Graphs icon in the left toolbar.

Figure 2. Tactile graph created with the mathematics module in TactileView.
6. Create tactile maps
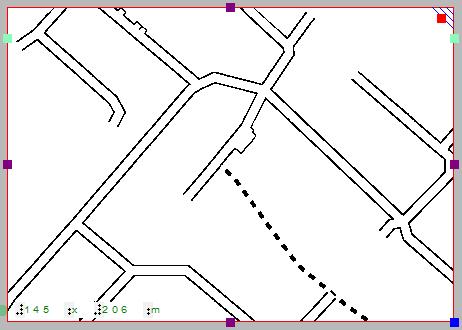
Producing maps of an area of any size (part of a city, region, country or even a continent) can be done with the map maker module in TactileView. Select ‘Compose map’ from the Portal menu, or click the map icon in the top toolbar.
The maps are composed on the RouteTactile website by selecting the area you wish to include in the map or which features (streets, rivers, buildings, etc.) should be included. Keep in mind that including more elements will increase the complexity of the map.

Figure 3. Tactile map created with RouteTactile.
7. Combine text and graphics in one document
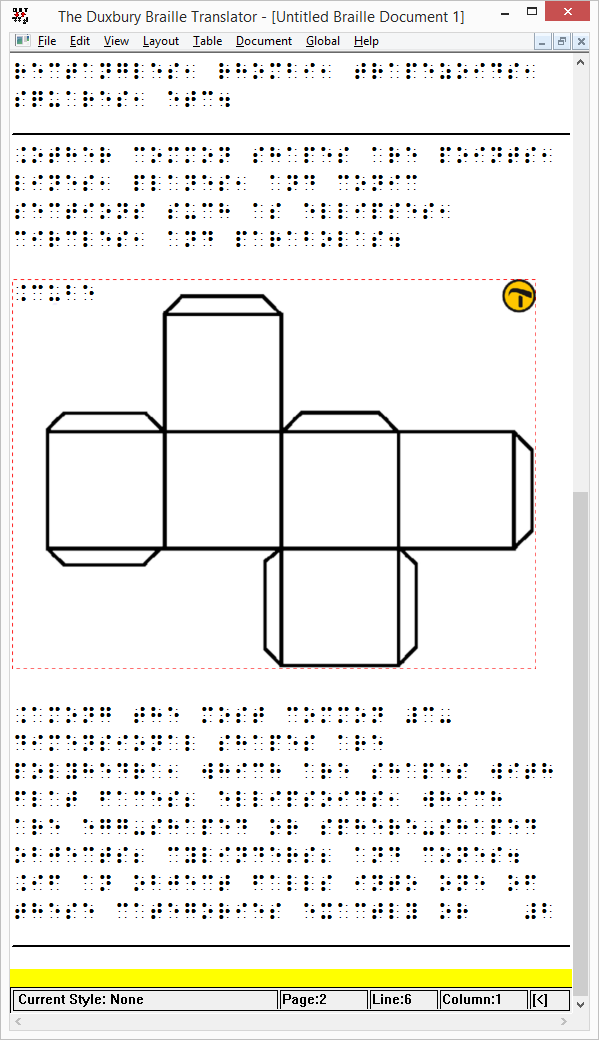
Texts can be included in TactileView documents, but for some purposes it is required to have a document where the graphics are part of a text book. The graphics can then be inserted in a braille editor such as Duxbury Braille Translator (DBT).
Texts can be included in TactileView documents, but for some purposes it is required to have a document where the graphics are part of a text book. The graphics can then be inserted in a braille editor such as Duxbury Braille Translator (DBT).

Figure 4. TactileView design inserted in Duxbury Braille Translator.

 Previous section
 Return to TactileView manual overview