 Previous section
 Return to TactileView manual overview
The drawing tool ‘Select area’ enables you to manipulate a section of the design. After activating the tool, two types of functions become available: ‘Select Rectangle’ (default) and ‘Insert or remove space’. The rectangular selection allows you to make localized adjustments to the contents of your design. Inserting or removing horizontal/vertical space is used to locally adjust the size of the drawing canvas.
After choosing ‘Select area’ from the drawing tools icon bar or Drawing tools menu, move the mouse into the drawing area and click to set the first position of the first corner. Next, move the cursor and click a second time to complete the selection. Alternatively, you can also click and hold for the first position, then move the cursor and release at the second position.
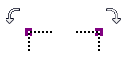
A dotted rectangle will indicate which area is selected. This selection can be adjusted by dragging the purple markers around the selection. To reposition the selection, move the cursor over the rectangle, then click and hold to drag the selection to another position.
Alternatively, you can select ‘Size and position’ from the properties toolbar or context menu to adjust the selection.

Figure 1. Selecting an area in the design.
Select area icon: ![]()
Select rectangle icon: ![]()
A number of small icons along the edges of the selection give quick access to a few functions for editing the selected area.
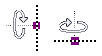
Mirroring horizontally flips the selected image left to right, like turning a page in a book. Mirroring vertically flips the image upside down, like turning a page in a wall calendar.
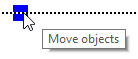
Rotation and mirroring the area can be performed by simply clicking on the corresponding icons. The large red is used to move the selected area of the bitmap, whereas the blue marker allows you to move all objects and text labels that are (partially) within the selection.
The right vertical toolbar will show the full list of options for manipulating the selected section of the design.
Mirror selection icons:
Red marker for moving the bitmap:
![]()
Blue marker for moving objects:
To isolate the contents of the selected area from the rest of the design, select ‘Crop Area’. Only the content will remain as the design, as the area outside the selection will be removed.
Select ‘Paint Area White’ to fill the selected part of the bitmap with white. Any objects in the selection will not be affected and have to be fused first to make them white. You can either fuse all objects within the selection by selecting ‘Fuse the selected objects with the bitmap’, or fuse objects individually by selecting and then fusing them.
Paint area white icon:
The selected area of the bitmap can be resized and moved by choosing ‘Convert to figure’. The purple markers around this figure can be used to resize the selection.
You can also choose ‘Save as figure (file)’ to save the figure to reuse it in other designs.
Convert to figure icon:
The selected content can be processed using the range of filters. These have the same functionality as the list of filters in the Filters menu, but will only be applied to the selection instead of the entire design.
Figure 2. Local adjustments by applying a filter to the selected area.
The function ‘Selected strips’ can be used to remove the selected vertical or horizontal area, or to add this amount of white space to the design. To use this tool, activate ‘Select area’, then ‘Insert or remove space’.
A crosshair cursor will appear when you move the mouse to the drawing area. By clicking once, the first outline of the selection is positioned, as indicated by the dotted green lines. Next, move the mouse horizontally or vertically and click a second time to complete the selection of the strip. Once again, you can also click and drag, then release at the second position to define the selection.
The width of the horizontal or vertical selection can be adjusted by dragging the purple marker on the green dotted lines.
A preview when hovering over the green plus sign will display the addition, whereas hovering over the red minus sign shows the design with the deleted area. Simply clicking on either sign will confirm the action.
Figure 3. Add or remove a horizontal or vertical area in the design.
Insert or remove space icon: ![]()