 Previous section
 Return to TactileView manual overview
The transparency comes into play when two or more objects are (partly) overlapping. When the object is transparent, all blue parts of the objects ‘below’ it will be visible and included on the print. When the object is not transparent, (parts of) the object below will be covered.
Select ‘Change to cover underlying image (is now transparent)’ from the properties toolbar or context menu to make the object non-transparent. Vice versa, select ‘Change to make the underlying image visible (is now not transparent)’ to make the object transparent.
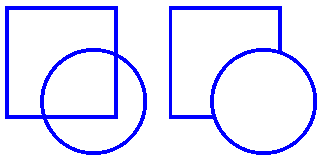
Figure 1. The circle on the left is transparent, revealing the square below; the circle on the right is non-transparent and covers the square.
‘Make object transparent’ icon: ![]()
‘Make object non-transparent’ icon: ![]()
By default, the order in which the objects are placed in the design determines the stacking order, i.e. which object is ‘on top’ and will overlap ‘lower’ object(s). Objects that were placed later will be on top of earlier placed objects.
You can easily get an overview of the stacking order of the objects in your design by selecting ‘Screen elements’ from the second horizontal toolbar, then choosing ‘Show object stacking’. When this is activated, the object order is indicated with green numbers for transparent objects and orange numbers for non-transparent objects. The lowest numbers will be on top, e.g. object 1 will cover object 3 when it is not transparent.
If you want to reverse the object order, select the object that you wish to move below or on top of another object, then select ‘To back’ or ‘To front’ to move it below or on top of the other object(s) respectively.
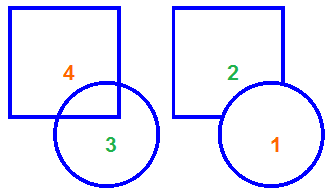
Figure 2. The green and orange numbers show the stacking order of the circles and squares.
‘Screen elements’ icon: ![]()
‘Show object stacking’ icon: ![]()
‘To front’ icon: ![]()
‘To back’ icon: ![]()