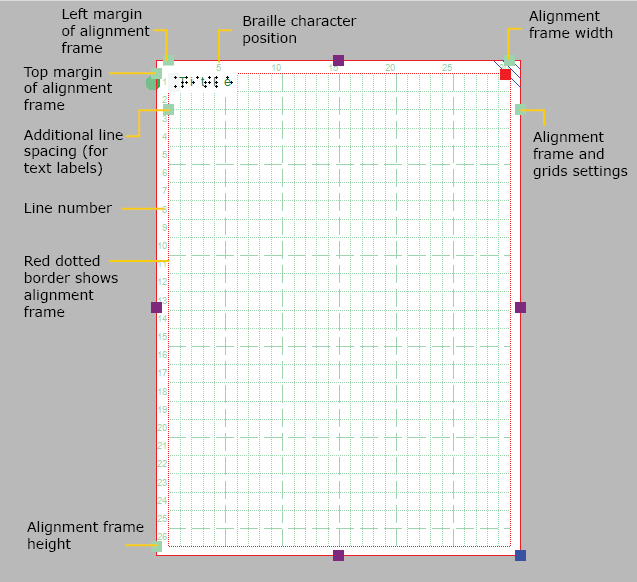
The braille grid is used to align text labels in a regular grid for consistency and to conform to certain layout guidelines for braille documents.
For a comparison with the measurements grid, see: Alignment grids or Measurements grid (object alignment).

Figure 1. Braille grid shown within the (optional) alignment frame.
The braille grid is composed of a regular pattern of cells the size of a braille character. This grid can be used to align text labels in this regular pattern throughout your design. This will ensure all characters are aligned above each other and that the lines of text are evenly spaced in the entire document, as is required in some guidelines for braille documents.
By default, text labels are ‘magnetically’ aligned (snapped) to the braille grid by dragging or placing the label with its edges close to the grid lines. Dashed green lines will indicate when the text label is aligned to the grid. You can switch off the alignment in the Alignment grids settings dialog by deselecting ‘Align text labels to grid’ or by disabling alignment in the context menu of a text label. Any text labels that extend beyond the edge of the braille grid are automatically resized to fit within the grid area.
The lines and characters in each line are numbered along the sides of the braille grid. By default, the title label is placed at character 1 of line 1.

Figure 1. Green dashed lines indicate the text label is aligned in the braille grid.
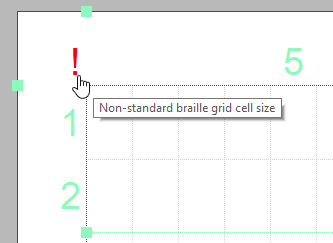
The size of a braille character has been standardized, but not all braille embossers have a printing resolution that allows text to be embossed exactly matching this standard size. The grid cells on screen will represent the true size of the embossed braille characters. A red exclamation mark at the top left corner of the braille grid will notify you when the size of the embossed braille will differ from the standardized braille size.
The size of the grid cells will also be automatically adjusted when an 8 dot braille table is selected as the main braille table of the document.

Figure 2. A red exclamation mark near the top left corner of the grid signifies the braille cells have a non-standard size.
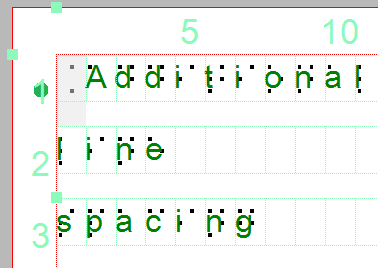
You can choose to use extra line spacing between lines of text throughout the document. For example, a value of 0.5 will add an empty space of half the height of a braille character between two lines of text. This line spacing is visible on screen in the braille grid.
This can be selected by clicking on the light green markers on the left hand side between text lines 2 and 3. Alternatively, the value can be changed in the grid settings dialog or by selecting ‘Additional line spacing’ from the properties toolbar or context menu of a selected text label.

Additional line spacing adds white space between lines of text in the braille grid and text labels.

 Previous section
 Return to TactileView manual overview